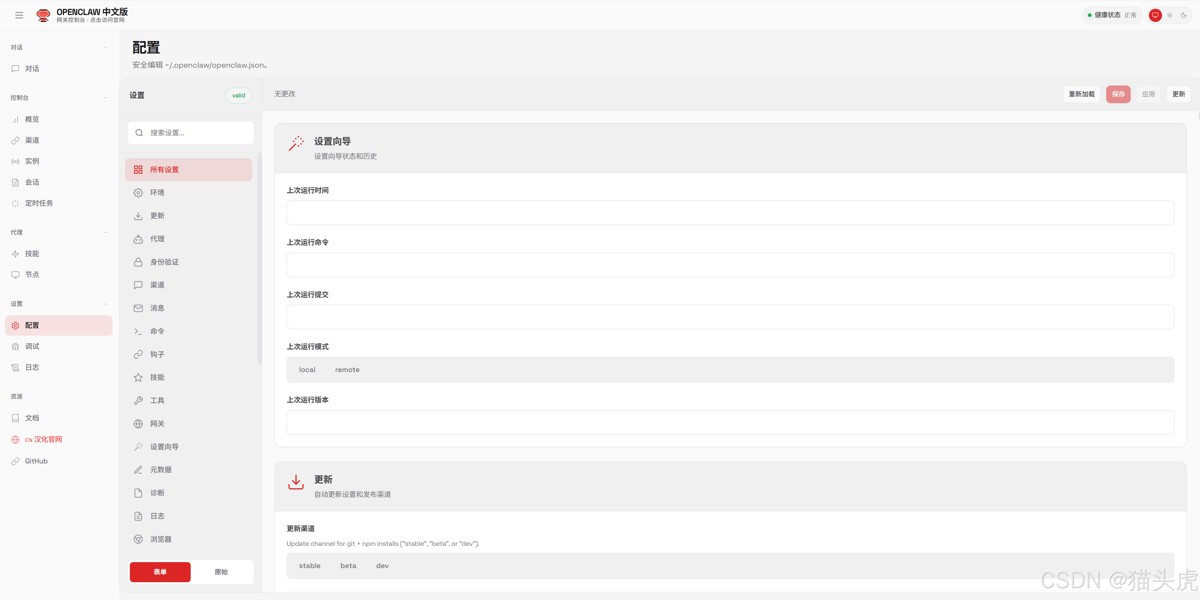
使用Docker部署OpenClaw汉化中文版的全过程

Written by

in

文章目录
  • 自动完成初始化、配置远程访问、启动容器: # Linux / macOS curl -fsSL https://cdn.jsdelivr.net/gh/1186258278/OpenClawChineseTranslation@main/docker-deploy.sh | bash # Windows PowerShell irm https://cdn.jsdelivr.net/gh/1186258278/OpenClawChineseTranslation@main/docker-deploy.ps1 | iex
  • 适用于在本机运行并通过 localhost 访问: # 1. 初始化配置(首次运行) docker run –rm -v openclaw-data:/root/.openclaw ghcr.io/1186258278/openclaw-zh:latest openclaw setup docker run –rm -v openclaw-data:/root/.openclaw ghcr.io/1186258278/openclaw-zh:latest openclaw config set gateway.mode local # 2. 启动容器 docker run -d –name openclaw -p 18789:18789 -v openclaw-data:/root/.openclaw ghcr.io/1186258278/openclaw-zh:latest openclaw gateway run 访问:http://localhost:18789
  • 部署到服务器并从其他设备访问时,需要额外配置: # 1. 创建数据卷 docker volume create openclaw-data # 2. 初始化配置 docker run –rm -v openclaw-data:/root/.openclaw ghcr.io/1186258278/openclaw-zh:latest openclaw setup # 3. 配置远程访问参数 docker run –rm -v openclaw-data:/root/.openclaw ghcr.io/1186258278/openclaw-zh:latest openclaw config set gateway.mode local docker run –rm -v openclaw-data:/root/.openclaw ghcr.io/1186258278/openclaw-zh:latest openclaw config set gateway.bind lan # 4. 设置访问令牌(推荐) docker run –rm -v openclaw-data:/root/.openclaw ghcr.io/1186258278/openclaw-zh:latest openclaw config set gateway.auth.token your-secure-token # 5. 启动容器 docker run -d –name openclaw -p 18789:18789 -v openclaw-data:/root/.openclaw –restart unless-stopped ghcr.io/1186258278/openclaw-zh:latest openclaw gateway run 访问:http://服务器IP:18789 → 在 Dashboard 输入 token 连接
  • 通过 HTTP 从非 localhost 访问时,浏览器会阻止设备身份验证(Web Crypto API 需要 secure context)。 推荐解决方案:设置 Token 认证 # 1. 设置访问令牌 docker exec openclaw openclaw config set gateway.auth.token YOUR_TOKEN docker restart openclaw # 2. 在浏览器访问远程地址 http://服务器IP:18789/overview # 3. 在「网关令牌」输入框填入 YOUR_TOKEN,点击「连接」 设置 gateway.auth.token 后,即使通过远程 HTTP 访问,只要在 Dashboard 输入正确的 token 就能连接成功。 其他解决方案对比: 方案 说明 适用场景 设置 Token 设置 gateway.auth.token,Dashboard 输入 token 内网(最简单) SSH 端口转发 ssh -L 18789:127.0.0.1:18789 user@server 更安全 Tailscale Serve 自动 HTTPS 访问 跨网络访问 Nginx + HTTPS 配置 SSL 证书反向代理 生产环境
  • 如果使用 Nginx 等反向网络,需要额外配置 gateway.trustedProxies,否则会提示 Proxy headers detected from untrusted address。 1. 配置 OpenClaw 信任代理地址 # Docker 环境 docker exec openclaw openclaw config set gateway.trustedProxies ‘[“127.0.0.1”, “::1”]’ docker restart openclaw # npm 安装环境 openclaw config set gateway.trustedProxies ‘[“127.0.0.1”, “::1”]’ openclaw gateway restart 如果 Nginx 和 OpenClaw 在不同服务器,将 127.0.0.1 替换为 Nginx 服务器的 IP 地址。 2. Nginx 配置示例 # /etc/nginx/sites-available/openclaw server { listen 443 ssl http2; server_name oc.example.com; # SSL 证书配置(推荐使用 Let’s Encrypt) ssl_certificate /etc/letsencrypt/live/oc.example.com/fullchain.pem; ssl_certificate_key /etc/letsencrypt/live/oc.example.com/privkey.pem; # SSL 安全配置 ssl_protocols TLSv1.2 TLSv1.3; ssl_ciphers ECDHE-ECDSA-AES128-GCM-SHA256:ECDHE-RSA-AES128-GCM-SHA256; ssl_prefer_server_ciphers off; location / { proxy_pass http://127.0.0.1:18789; proxy_http_version 1.1; # WebSocket 支持(必须) proxy_set_header Upgrade $http_upgrade; proxy_set_header Connection “upgrade”; # 转发真实客户端信息 proxy_set_header Host $host; proxy_set_header X-Real-IP $remote_addr; proxy_set_header X-Forwarded-For $proxy_add_x_forwarded_for; proxy_set_header X-Forwarded-Proto $scheme; # 超时配置 proxy_read_timeout 86400; proxy_send_timeout 86400; } } # HTTP 重定向到 HTTPS server { listen 80; server_name oc.example.com; return 301 https://$server_name$request_uri; } 3. 启用配置 sudo ln -s /etc/nginx/sites-available/openclaw /etc/nginx/sites-enabled/ sudo nginx -t sudo systemctl reload nginx
  • 项目提供了开箱即用的 docker-compose.yml: # 下载配置文件 curl -fsSL https://cdn.jsdelivr.net/gh/1186258278/OpenClawChineseTranslation@main/docker-compose.yml -o docker-compose.yml # 启动(首次会自动初始化) docker-compose up -d 或手动创建 docker-compose.yml: version: ‘3.8’ services: openclaw: image: ghcr.io/1186258278/openclaw-zh:latest container_name: openclaw ports: – “18789:18789” volumes: – openclaw-data:/root/.openclaw environment: – OPENCLAW_GATEWAY_TOKEN=your-secure-token restart: unless-stopped volumes: openclaw-data:
  • # 1. 克隆汉化项目 git clone https://github.com/1186258278/OpenClawChineseTranslation.git cd OpenClawChineseTranslation # 2. 克隆上游源码 git clone https://github.com/openclaw/openclaw.git openclaw # 3. 应用汉化 npm run cli — apply # 4. 构建 Docker 镜像 cd openclaw docker build -t openclaw-zh:local . # 5. 运行 docker run -d –name openclaw -p 18789:18789 -v openclaw-data:/root/.openclaw openclaw-zh:local
  • # 查看日志 docker logs -f openclaw # 停止/重启容器 docker stop openclaw docker restart openclaw # 进入容器 docker exec -it openclaw sh # 删除容器 docker stop openclaw && docker rm openclaw # 查看配置 docker exec openclaw openclaw config get gateway # 在容器内执行 OpenClaw 命令 docker exec openclaw openclaw –help docker exec openclaw openclaw status
  • Docker 镜像和容器会占用大量磁盘空间(OpenClaw 镜像约 4GB),建议定期清理: # 查看 Docker 空间占用 docker system df # 清理已停止的容器 docker container prune -f # 清理未使用的镜像 docker image prune -f # 清理构建缓存 docker builder prune -f # 一键清理所有未使用资源(镜像、容器、网络、缓存) docker system prune -a # 连同未使用的数据卷一起清理(会删除数据,谨慎使用) docker system prune -a –volumes
  • 错误信息 原因 解决方案 Gateway auth is set to token, but no token is configured 需要 token 认证但未配置 docker exec openclaw openclaw config set gateway.auth.token YOUR_TOKEN Missing config. Run openclaw setup 未初始化配置 docker exec openclaw openclaw setup control ui requires HTTPS or localhost HTTP 远程访问被浏览器安全策略阻止 使用 Token 认证或配置 HTTPS 反向代理 Proxy headers detected from untrusted address 反向代理地址未添加到信任列表 docker exec openclaw openclaw config set gateway.trustedProxies '["127.0.0.1"]' pairing required 新设备需要配对授权 docker exec openclaw openclaw devices list 然后 devices approve <id> gateway token mismatch Token 认证失败 docker exec openclaw openclaw dashboard –print-url 获取带 token 的 URL 容器启动后立即退出 缺少必要配置 docker logs openclaw 查看日志 EACCES: permission denied 数据卷权限问题 确保使用 named volume 而非 bind mount Docker 拉取镜像提示 denied 登录缓存问题 docker logout ghcr.io 后重试
  • # 1. 拉取最新镜像 docker pull ghcr.io/1186258278/openclaw-zh:latest # 2. 停止并删除旧容器 docker stop openclaw && docker rm openclaw # 3. 用新镜像启动(配置自动保留,存储在数据卷中) docker run -d –name openclaw -p 18789:18789 -v openclaw-data:/root/.openclaw –restart unless-stopped ghcr.io/1186258278/openclaw-zh:latest openclaw gateway run
  • 恭喜! 至此,你已经成功掌握了 OpenClaw 汉化版的完整 Docker 部署方案。从本地快速启动到服务器远程部署,从 Token 认证到 Nginx HTTPS 反向代理,再到日常的空间清理和故障排查——你现在拥有了一个完全自主可控的中文 AI 助手。无论是个人使用还是团队协作,OpenClaw 的多平台支持和自动化同步机制都能满足你的需求。 以上就是使用Docker部署OpenClaw汉化中文版的全过程的详细内容,更多关于Docker部署OpenClaw汉化中文版的资料请关注风君子博客其它相关文章!
  • 目录
    • 一键部署脚本(推荐)
    • 本地快速启动
    • 服务器远程部署
    • 远程访问与 Token 认证
    • Nginx + HTTPS 反向网络
    • Docker Compose
    • 自行构建镜像
    • 常用命令
    • 空间清理
    • 常见错误排查
    • 更新 Docker 镜像
    • 总结

    本文档详细介绍如何使用 Docker 部署 OpenClaw 汉化中文版。
    自动完成初始化、配置远程访问、启动容器:

    # Linux / macOS
    curl -fsSL https://cdn.jsdelivr.net/gh/1186258278/OpenClawChineseTranslation@main/docker-deploy.sh | bash
    # Windows PowerShell
    irm https://cdn.jsdelivr.net/gh/1186258278/OpenClawChineseTranslation@main/docker-deploy.ps1 | iex

    适用于在本机运行并通过 localhost 访问:

    # 1. 初始化配置(首次运行)
    docker run --rm -v openclaw-data:/root/.openclaw 
      ghcr.io/1186258278/openclaw-zh:latest openclaw setup
    
    docker run --rm -v openclaw-data:/root/.openclaw 
      ghcr.io/1186258278/openclaw-zh:latest openclaw config set gateway.mode local
    
    # 2. 启动容器
    docker run -d 
      --name openclaw 
      -p 18789:18789 
      -v openclaw-data:/root/.openclaw 
      ghcr.io/1186258278/openclaw-zh:latest 
      openclaw gateway run
    

    访问:http://localhost:18789

    部署到服务器并从其他设备访问时,需要额外配置:

    # 1. 创建数据卷
    docker volume create openclaw-data
    
    # 2. 初始化配置
    docker run --rm -v openclaw-data:/root/.openclaw 
      ghcr.io/1186258278/openclaw-zh:latest openclaw setup
    
    # 3. 配置远程访问参数
    docker run --rm -v openclaw-data:/root/.openclaw 
      ghcr.io/1186258278/openclaw-zh:latest openclaw config set gateway.mode local
    
    docker run --rm -v openclaw-data:/root/.openclaw 
      ghcr.io/1186258278/openclaw-zh:latest openclaw config set gateway.bind lan
    
    # 4. 设置访问令牌(推荐)
    docker run --rm -v openclaw-data:/root/.openclaw 
      ghcr.io/1186258278/openclaw-zh:latest openclaw config set gateway.auth.token your-secure-token
    
    # 5. 启动容器
    docker run -d 
      --name openclaw 
      -p 18789:18789 
      -v openclaw-data:/root/.openclaw 
      --restart unless-stopped 
      ghcr.io/1186258278/openclaw-zh:latest 
      openclaw gateway run
    

    访问:http://服务器IP:18789 → 在 Dashboard 输入 token 连接

    通过 HTTP 从非 localhost 访问时,浏览器会阻止设备身份验证(Web Crypto API 需要 secure context)。

    推荐解决方案:设置 Token 认证

    # 1. 设置访问令牌
    docker exec openclaw openclaw config set gateway.auth.token YOUR_TOKEN
    docker restart openclaw
    
    # 2. 在浏览器访问远程地址
    http://服务器IP:18789/overview
    
    # 3. 在「网关令牌」输入框填入 YOUR_TOKEN,点击「连接」
    

    设置 gateway.auth.token 后,即使通过远程 HTTP 访问,只要在 Dashboard 输入正确的 token 就能连接成功。

    其他解决方案对比:

    方案 说明 适用场景
    设置 Token 设置 gateway.auth.token,Dashboard 输入 token 内网(最简单)
    SSH 端口转发 ssh -L 18789:127.0.0.1:18789 user@server 更安全
    Tailscale Serve 自动 HTTPS 访问 跨网络访问
    Nginx + HTTPS 配置 SSL 证书反向代理 生产环境

    如果使用 Nginx 等反向网络,需要额外配置 gateway.trustedProxies,否则会提示 Proxy headers detected from untrusted address

    1. 配置 OpenClaw 信任代理地址

    # Docker 环境
    docker exec openclaw openclaw config set gateway.trustedProxies '["127.0.0.1", "::1"]'
    docker restart openclaw
    
    # npm 安装环境
    openclaw config set gateway.trustedProxies '["127.0.0.1", "::1"]'
    openclaw gateway restart
    

    如果 Nginx 和 OpenClaw 在不同服务器,将 127.0.0.1 替换为 Nginx 服务器的 IP 地址。

    2. Nginx 配置示例

    # /etc/nginx/sites-available/openclaw
    server {
        listen 443 ssl http2;
        server_name oc.example.com;
        # SSL 证书配置(推荐使用 Let's Encrypt)
        ssl_certificate /etc/letsencrypt/live/oc.example.com/fullchain.pem;
        ssl_certificate_key /etc/letsencrypt/live/oc.example.com/privkey.pem;
        # SSL 安全配置
        ssl_protocols TLSv1.2 TLSv1.3;
        ssl_ciphers ECDHE-ECDSA-AES128-GCM-SHA256:ECDHE-RSA-AES128-GCM-SHA256;
        ssl_prefer_server_ciphers off;
        location / {
            proxy_pass http://127.0.0.1:18789;
            proxy_http_version 1.1;
            # WebSocket 支持(必须)
            proxy_set_header Upgrade $http_upgrade;
            proxy_set_header Connection "upgrade";
            # 转发真实客户端信息
            proxy_set_header Host $host;
            proxy_set_header X-Real-IP $remote_addr;
            proxy_set_header X-Forwarded-For $proxy_add_x_forwarded_for;
            proxy_set_header X-Forwarded-Proto $scheme;
            # 超时配置
            proxy_read_timeout 86400;
            proxy_send_timeout 86400;
        }
    }
    # HTTP 重定向到 HTTPS
    server {
        listen 80;
        server_name oc.example.com;
        return 301 https://$server_name$request_uri;
    }

    3. 启用配置

    sudo ln -s /etc/nginx/sites-available/openclaw /etc/nginx/sites-enabled/
    sudo nginx -t
    sudo systemctl reload nginx
    

    项目提供了开箱即用的 docker-compose.yml

    # 下载配置文件
    curl -fsSL https://cdn.jsdelivr.net/gh/1186258278/OpenClawChineseTranslation@main/docker-compose.yml -o docker-compose.yml
    
    # 启动(首次会自动初始化)
    docker-compose up -d
    

    或手动创建 docker-compose.yml

    version: '3.8'
    services:
      openclaw:
        image: ghcr.io/1186258278/openclaw-zh:latest
        container_name: openclaw
        ports:
          - "18789:18789"
        volumes:
          - openclaw-data:/root/.openclaw
        environment:
          - OPENCLAW_GATEWAY_TOKEN=your-secure-token
        restart: unless-stopped
    volumes:
      openclaw-data:

    # 1. 克隆汉化项目
    git clone https://github.com/1186258278/OpenClawChineseTranslation.git
    cd OpenClawChineseTranslation
    
    # 2. 克隆上游源码
    git clone https://github.com/openclaw/openclaw.git openclaw
    
    # 3. 应用汉化
    npm run cli -- apply
    
    # 4. 构建 Docker 镜像
    cd openclaw
    docker build -t openclaw-zh:local .
    
    # 5. 运行
    docker run -d --name openclaw -p 18789:18789 
      -v openclaw-data:/root/.openclaw openclaw-zh:local
    

    # 查看日志
    docker logs -f openclaw
    
    # 停止/重启容器
    docker stop openclaw
    docker restart openclaw
    
    # 进入容器
    docker exec -it openclaw sh
    
    # 删除容器
    docker stop openclaw && docker rm openclaw
    
    # 查看配置
    docker exec openclaw openclaw config get gateway
    
    # 在容器内执行 OpenClaw 命令
    docker exec openclaw openclaw --help
    docker exec openclaw openclaw status
    

    Docker 镜像和容器会占用大量磁盘空间(OpenClaw 镜像约 4GB),建议定期清理:

    # 查看 Docker 空间占用
    docker system df
    
    # 清理已停止的容器
    docker container prune -f
    
    # 清理未使用的镜像
    docker image prune -f
    
    # 清理构建缓存
    docker builder prune -f
    
    # 一键清理所有未使用资源(镜像、容器、网络、缓存)
    docker system prune -a
    
    # 连同未使用的数据卷一起清理(会删除数据,谨慎使用)
    docker system prune -a --volumes
    

    错误信息 原因 解决方案
    Gateway auth is set to token, but no token is configured 需要 token 认证但未配置 docker exec openclaw openclaw config set gateway.auth.token YOUR_TOKEN
    Missing config. Run openclaw setup 未初始化配置 docker exec openclaw openclaw setup
    control ui requires HTTPS or localhost HTTP 远程访问被浏览器安全策略阻止 使用 Token 认证或配置 HTTPS 反向代理
    Proxy headers detected from untrusted address 反向代理地址未添加到信任列表 docker exec openclaw openclaw config set gateway.trustedProxies '["127.0.0.1"]'
    pairing required 新设备需要配对授权 docker exec openclaw openclaw devices list 然后 devices approve <id>
    gateway token mismatch Token 认证失败 docker exec openclaw openclaw dashboard --print-url 获取带 token 的 URL
    容器启动后立即退出 缺少必要配置 docker logs openclaw 查看日志
    EACCES: permission denied 数据卷权限问题 确保使用 named volume 而非 bind mount
    Docker 拉取镜像提示 denied 登录缓存问题 docker logout ghcr.io 后重试

    # 1. 拉取最新镜像
    docker pull ghcr.io/1186258278/openclaw-zh:latest
    
    # 2. 停止并删除旧容器
    docker stop openclaw && docker rm openclaw
    
    # 3. 用新镜像启动(配置自动保留,存储在数据卷中)
    docker run -d --name openclaw -p 18789:18789 
      -v openclaw-data:/root/.openclaw 
      --restart unless-stopped 
      ghcr.io/1186258278/openclaw-zh:latest 
      openclaw gateway run
    

    恭喜! 至此,你已经成功掌握了 OpenClaw 汉化版的完整 Docker 部署方案。
    从本地快速启动到服务器远程部署,从 Token 认证到 Nginx HTTPS 反向代理,再到日常的空间清理和故障排查——你现在拥有了一个完全自主可控的中文 AI 助手。无论是个人使用还是团队协作,OpenClaw 的多平台支持和自动化同步机制都能满足你的需求。

    以上就是使用Docker部署OpenClaw汉化中文版的全过程的详细内容,更多关于Docker部署OpenClaw汉化中文版的资料请关注风君子博客其它相关文章!

    站内搜索