文章目录
- 字符串格式化是处理数值精度最直接的方法之一,特别适用于需要将数值嵌入文本的场景(如G代码生成)。 使用f-string格式化(Python 3.6+) # f-string格式化示例 Ym = [25.36789] # 示例坐标值 # 基本f-string格式化 result_basic = f”G00 Y{Ym[0]:.5f}” print(“基本格式化:”, result_basic) # 先进行加法运算再格式化 result_calculated = f”G00 Y{(Ym[0] + 10):.5f}” print(“加法后格式化:”, result_calculated) # 复杂表达式计算后格式化 result_complex = f”G00 Y{(Ym[0] * 2 + 5):.5f}” print(“复杂表达式:”, result_complex) 使用format()方法 # format()方法示例 Ym = [25.36789] # 基本format格式化 result_basic = “G00 Y{:.5f}”.format(Ym[0]) print(“format基本格式化:”, result_basic) # 表达式计算后格式化 result_calculated = “G00 Y{:.5f}”.format(Ym[0] + 10) print(“format加法格式化:”, result_calculated) # 多变量格式化 x_val = 15.12345 z_val = 8.45678 result_multi = “G01 X{:.3f} Y{:.5f} Z{:.3f}”.format(x_val, Ym[0] + 10, z_val) print(“多坐标格式化:”, result_multi) 百分号格式化(传统方法) # 百分号格式化示例 Ym = [25.36789] # 基本百分号格式化 result_basic = “G00 Y%.5f” % Ym[0] print(“百分号基本格式化:”, result_basic) # 表达式计算后格式化 result_calculated = “G00 Y%.5f” % (Ym[0] + 10,) print(“百分号加法格式化:”, result_calculated) # 多变量格式化 x_val = 15.12345 result_multi = “G01 X%.3f Y%.5f” % (x_val, Ym[0] + 10) print(“百分号多坐标:”, result_multi)
- 对于需要先进行数值计算再格式化的场景,Python提供了多种数值处理函数。 round()函数的使用 # round()函数示例 Ym = [25.36789] # 直接使用round函数 rounded_value = round(Ym[0] + 10, 5) print(“round结果:”, rounded_value) print(“round后格式化: G00 Y{:.5f}”.format(rounded_value)) # 注意round函数的四舍五入规则 test_values = [1.555, 2.665, 3.775, 4.885] for val in test_values: print(“值{}四舍五入到两位小数: {}”.format(val, round(val, 2))) decimal模块的高精度计算 # decimal模块示例(适用于金融计算等高精度场景) from decimal import Decimal, ROUND_HALF_UP Ym = [25.36789] # 创建Decimal对象并进行高精度计算 decimal_value = Decimal(str(Ym[0])) + Decimal(’10’) # 四舍五入到5位小数 rounded_decimal = decimal_value.quantize(Decimal(‘0.00000’), rounding=ROUND_HALF_UP) print(“Decimal计算结果:”, rounded_decimal) print(“Decimal格式化: G00 Y{}”.format(rounded_decimal)) # 直接转换为字符串 decimal_str = format(decimal_value, ‘.5f’) print(“Decimal直接格式化: G00 Y{}”.format(decimal_str))
- # 批量处理坐标值示例 import numpy as np def process_coordinates(coordinate_list, y_offset=10, precision=5): “”” 批量处理坐标值,对Y坐标进行偏移并格式化 参数: coordinate_list: 坐标列表,每个元素为(x, y, z)元组 y_offset: Y坐标偏移量 precision: 小数位数精度 返回: 格式化后的G代码行列表 “”” gcode_lines = [] for i, (x, y, z) in enumerate(coordinate_list): # 计算新Y坐标 new_y = y + y_offset # 格式化输出 line = f”G01 X{x:.{precision}f} Y{new_y:.{precision}f} Z{z:.{precision}f}” gcode_lines.append(line) # 每10个点添加一个注释 if i % 10 == 0: gcode_lines.append(f”; 点{i} – 坐标已偏移”) return gcode_lines # 示例用法 coordinates = [(i*0.5, i*0.3, 0) for i in range(20)] # 生成示例坐标 gcode_lines = process_coordinates(coordinates, y_offset=10, precision=5) print(“批量处理结果(前5行):”) for i, line in enumerate(gcode_lines[:5]): print(f”{i+1}: {line}”)
- # 自定义数值格式化类 class PrecisionFormatter: “””自定义数值格式化类,提供灵活的精度控制””” def __init__(self, default_precision=5): self.default_precision = default_precision def format_coordinate(self, value, offset=0, precision=None): “””格式化坐标值,可选的偏移和精度控制””” if precision is None: precision = self.default_precision # 应用偏移 result_value = value + offset # 格式化输出 return f”{result_value:.{precision}f}” def format_gcode_move(self, x, y, z, y_offset=0, precision=None): “””生成G代码移动指令””” if precision is None: precision = self.default_precision formatted_y = self.format_coordinate(y, y_offset, precision) return f”G01 X{x:.{precision}f} Y{formatted_y} Z{z:.{precision}f}” def set_precision(self, precision): “””设置默认精度””” self.default_precision = precision # 使用示例 formatter = PrecisionFormatter(default_precision=5) # 格式化单个坐标 x, y, z = 10.123456, 25.36789, 5.987654 formatted_line = formatter.format_gcode_move(x, y, z, y_offset=10) print(“自定义格式化结果:”, formatted_line) # 更改精度 formatter.set_precision(3) formatted_line_3dec = formatter.format_gcode_move(x, y, z, y_offset=10) print(“3位小数精度:”, formatted_line_3dec)
目录
- 1. G代码生成基础与数值处理的重要性
- 2. Python中的小数位数保留方法
- 2.1 字符串格式化方法
- 2.2 数值处理函数
- 3. 完整G代码生成实例
- 4. 高级数值处理技巧
- 4.1 批量处理坐标值
- 4.2 自定义数值格式化类
- 5. 精度控制与误差分析
- 6. 实际应用建议
在现代数控加工与3D打印领域,G代码作为机器控制的标准化语言,其精确性直接决定了加工质量。Python凭借其简洁的语法和强大的数值计算能力,已成为生成G代码的重要工具。本文将深入探讨如何在Python中处理数值运算并格式化输出,特别是针对G代码生成中的常见需求。
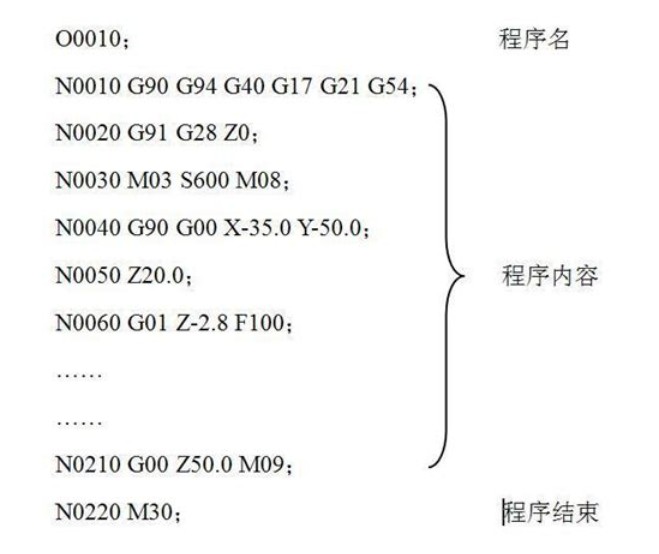
G代码是一种广泛应用于数控机床的编程语言,它由一系列指令组成,控制机器的运动轨迹、速度和其他参数。在生成G代码过程中,经常需要对坐标值进行数学运算并控制输出精度。例如,将某个坐标值偏移固定距离后保留特定小数位数,这正是本文要解决的核心问题。
在Python中处理数值精度时,我们需要理解浮点数的表示限制。由于计算机使用二进制表示小数,某些十进制小数无法精确表示,这可能导致精度误差。因此,在需要高精度计算的场合(如精密加工),必须采用适当的数值处理策略。
Python提供了多种保留小数位数的方法,每种方法各有特点,适用于不同场景。
字符串格式化是处理数值精度最直接的方法之一,特别适用于需要将数值嵌入文本的场景(如G代码生成)。
使用f-string格式化(Python 3.6+)
# f-string格式化示例
Ym = [25.36789]  # 示例坐标值

# 基本f-string格式化
result_basic = f"G00 Y{Ym[0]:.5f}"
print("基本格式化:", result_basic)

# 先进行加法运算再格式化
result_calculated = f"G00 Y{(Ym[0] + 10):.5f}"
print("加法后格式化:", result_calculated)

# 复杂表达式计算后格式化
result_complex = f"G00 Y{(Ym[0] * 2 + 5):.5f}"
print("复杂表达式:", result_complex)
使用format()方法
# format()方法示例
Ym = [25.36789]

# 基本format格式化
result_basic = "G00 Y{:.5f}".format(Ym[0])
print("format基本格式化:", result_basic)

# 表达式计算后格式化
result_calculated = "G00 Y{:.5f}".format(Ym[0] + 10)
print("format加法格式化:", result_calculated)

# 多变量格式化
x_val = 15.12345
z_val = 8.45678
result_multi = "G01 X{:.3f} Y{:.5f} Z{:.3f}".format(x_val, Ym[0] + 10, z_val)
print("多坐标格式化:", result_multi)
百分号格式化(传统方法)
# 百分号格式化示例
Ym = [25.36789]

# 基本百分号格式化
result_basic = "G00 Y%.5f" % Ym[0]
print("百分号基本格式化:", result_basic)

# 表达式计算后格式化
result_calculated = "G00 Y%.5f" % (Ym[0] + 10,)
print("百分号加法格式化:", result_calculated)

# 多变量格式化
x_val = 15.12345
result_multi = "G01 X%.3f Y%.5f" % (x_val, Ym[0] + 10)
print("百分号多坐标:", result_multi)
对于需要先进行数值计算再格式化的场景,Python提供了多种数值处理函数。
round()函数的使用
# round()函数示例
Ym = [25.36789]

# 直接使用round函数
rounded_value = round(Ym[0] + 10, 5)
print("round结果:", rounded_value)
print("round后格式化: G00 Y{:.5f}".format(rounded_value))

# 注意round函数的四舍五入规则
test_values = [1.555, 2.665, 3.775, 4.885]
for val in test_values:
    print("值{}四舍五入到两位小数: {}".format(val, round(val, 2)))
decimal模块的高精度计算
# decimal模块示例(适用于金融计算等高精度场景)
from decimal import Decimal, ROUND_HALF_UP

Ym = [25.36789]

# 创建Decimal对象并进行高精度计算
decimal_value = Decimal(str(Ym[0])) + Decimal('10')
# 四舍五入到5位小数
rounded_decimal = decimal_value.quantize(Decimal('0.00000'), rounding=ROUND_HALF_UP)
print("Decimal计算结果:", rounded_decimal)
print("Decimal格式化: G00 Y{}".format(rounded_decimal))

# 直接转换为字符串
decimal_str = format(decimal_value, '.5f')
print("Decimal直接格式化: G00 Y{}".format(decimal_str))
下面通过一个完整的G代码生成器示例,展示如何在实际应用中处理数值运算和格式化。
# 完整G代码生成器示例
import numpy as np

class GCodeGenerator:
    def __init__(self, precision=5):
        self.gcode = []
        self.precision = precision

    def move_to(self, x, y, z, feed_rate=1000):
        """生成移动指令,包含数值运算和格式化"""
        # 对Y坐标进行加法运算并保留指定位数小数
        y_calculated = y + 10  # 这里演示Ym[0] + 10的操作

        # 使用格式化字符串确保小数位数
        line = f"G01 X{x:.{self.precision}f} Y{y_calculated:.{self.precision}f} Z{z:.{self.precision}f} F{feed_rate}"
        self.gcode.append(line)

    def generate_square_path(self, size=50, start_x=0, start_y=0):
        """生成方形路径G代码"""
        # 移动到起点
        self.move_to(start_x, start_y, 0)

        # 生成方形路径
        path_points = [
            (start_x + size, start_y),      # 右移
            (start_x + size, start_y + size), # 上移
            (start_x, start_y + size),       # 左移
            (start_x, start_y)              # 下移(返回起点)
        ]

        for point in path_points:
            self.move_to(point[0], point[1], 0)

    def generate_circular_path(self, center_x=0, center_y=0, radius=25, segments=36):
        """生成圆形路径G代码"""
        for i in range(segments + 1):
            angle = 2 * np.pi * i / segments
            x = center_x + radius * np.cos(angle)
            y = center_y + radius * np.sin(angle)
            self.move_to(x, y, 0)

    def save_to_file(self, filename):
        """将G代码保存到文件"""
        with open(filename, 'w') as f:
            for line in self.gcode:
                f.write(line + 'n')
        print(f"G代码已保存到文件: {filename}")

    def display_code(self, num_lines=10):
        """显示前几行G代码"""
        print("生成的G代码(前{}行):".format(num_lines))
        for i, line in enumerate(self.gcode[:num_lines]):
            print(f"{i+1}: {line}")

# 使用示例
if __name__ == "__main__":
    # 创建G代码生成器实例,设置精度为5位小数
    generator = GCodeGenerator(precision=5)

    # 生成方形路径
    generator.generate_square_path(size=30)

    # 显示部分代码
    generator.display_code(5)

    # 保存到文件
    generator.save_to_file("square_path.gcode")

    # 生成圆形路径示例
    circular_generator = GCodeGenerator(precision=5)
    circular_generator.generate_circular_path(radius=20)
    circular_generator.save_to_file("circular_path.gcode")
在实际的G代码生成过程中,可能会遇到更复杂的数值处理需求。下面介绍几种高级技巧。
# 批量处理坐标值示例
import numpy as np

def process_coordinates(coordinate_list, y_offset=10, precision=5):
    """
    批量处理坐标值,对Y坐标进行偏移并格式化

    参数:
        coordinate_list: 坐标列表,每个元素为(x, y, z)元组
        y_offset: Y坐标偏移量
        precision: 小数位数精度

    返回:
        格式化后的G代码行列表
    """
    gcode_lines = []

    for i, (x, y, z) in enumerate(coordinate_list):
        # 计算新Y坐标
        new_y = y + y_offset

        # 格式化输出
        line = f"G01 X{x:.{precision}f} Y{new_y:.{precision}f} Z{z:.{precision}f}"
        gcode_lines.append(line)

        # 每10个点添加一个注释
        if i % 10 == 0:
            gcode_lines.append(f"; 点{i} - 坐标已偏移")

    return gcode_lines

# 示例用法
coordinates = [(i*0.5, i*0.3, 0) for i in range(20)]  # 生成示例坐标
gcode_lines = process_coordinates(coordinates, y_offset=10, precision=5)

print("批量处理结果(前5行):")
for i, line in enumerate(gcode_lines[:5]):
    print(f"{i+1}: {line}")
# 自定义数值格式化类
class PrecisionFormatter:
    """自定义数值格式化类,提供灵活的精度控制"""

    def __init__(self, default_precision=5):
        self.default_precision = default_precision

    def format_coordinate(self, value, offset=0, precision=None):
        """格式化坐标值,可选的偏移和精度控制"""
        if precision is None:
            precision = self.default_precision

        # 应用偏移
        result_value = value + offset

        # 格式化输出
        return f"{result_value:.{precision}f}"

    def format_gcode_move(self, x, y, z, y_offset=0, precision=None):
        """生成G代码移动指令"""
        if precision is None:
            precision = self.default_precision

        formatted_y = self.format_coordinate(y, y_offset, precision)
        return f"G01 X{x:.{precision}f} Y{formatted_y} Z{z:.{precision}f}"

    def set_precision(self, precision):
        """设置默认精度"""
        self.default_precision = precision

# 使用示例
formatter = PrecisionFormatter(default_precision=5)

# 格式化单个坐标
x, y, z = 10.123456, 25.36789, 5.987654
formatted_line = formatter.format_gcode_move(x, y, z, y_offset=10)
print("自定义格式化结果:", formatted_line)

# 更改精度
formatter.set_precision(3)
formatted_line_3dec = formatter.format_gcode_move(x, y, z, y_offset=10)
print("3位小数精度:", formatted_line_3dec)
在G代码生成中,精度控制至关重要。下面探讨不同方法的精度特性及适用场景。
# 精度分析与比较
def compare_precision_methods():
    """比较不同精度控制方法的差异"""
    original_value = 25.36789
    offset = 10
    expected_result = 35.36789

    methods = {
        "f-string": f"{original_value + offset:.5f}",
        "format()": "{:.5f}".format(original_value + offset),
        "百分号": "%.5f" % (original_value + offset),
        "round()": str(round(original_value + offset, 5)),
    }

    print("不同方法精度比较:")
    for name, result in methods.items():
        print(f"{name:>10}: {result}")

    # 数值精度分析
    value = original_value + offset
    print(f"n原始数值: {value}")
    print(f"IEEE 754表示限制: {value.hex()}")

    # 显示不同精度下的表示
    for digits in range(3, 8):
        formatted = f"{value:.{digits}f}"
        print(f"{digits}位小数: {formatted}")

# 执行比较
compare_precision_methods()
在真实世界的G代码生成项目中,考虑以下最佳实践:
- 一致性原则:在整个项目中保持相同的小数位数精度,避免因精度不一致导致的路径偏差。
- 性能考量:对于需要生成大量G代码的场景,f-string通常具有更好的性能表现。
- 可读性与维护性:使用清晰的变量名和注释,说明数值处理的逻辑,便于后续维护。
- 错误处理:添加适当的异常处理机制,应对数值计算中可能出现的边界情况。
- 标准化输出:遵循目标数控机床的G代码方言和规范,确保生成代码的兼容性。
通过本文介绍的方法和技巧,您可以 confidently 在Python中处理G代码生成过程中的数值运算和格式化需求,确保生成高精度、符合规范的机器指令代码。无论是简单的坐标偏移还是复杂的路径规划,适当的数值处理策略都是实现精确控制的基础。
到此这篇关于一文详解Python如何处理数值运算并格式化输出的文章就介绍到这了,更多相关Python处理数值运算内容请搜索风君子博客以前的文章或继续浏览下面的相关文章希望大家以后多多支持风君子博客!
您可能感兴趣的文章:
- educoder之Python数值计算库Numpy图像处理详解
- Python 数值区间处理_对interval 库的快速入门详解
- 对python3 一组数值的归一化处理方法详解
- python数据预处理之将类别数据转换为数值的方法
- Python实现打印输出格式化方法的完全指南
- Python中输入和输出格式化操作详解
- Python中常见的三种字符串格式化输出方法小结
- Python数据的标准输出与格式化输出