文章目录
- pip install paramiko
- 第一阶段:最基础的SSH连接 import paramiko # 第一步:创建SSH客户端 ssh_client = paramiko.SSHClient() # 第二步:设置自动接受未知主机密钥(学习时使用,生产环境不建议) ssh_client.set_missing_host_key_policy(paramiko.AutoAddPolicy()) # 第三步:连接到服务器 ssh_client.connect( hostname=’192.168.102.131′, port=22, # SSH默认端口 username=’yt’, password=’123.com’ ) print(“连接成功!”) # 第四步:执行一个简单命令 # stdin,stdout,stderr = ssh_client.exec_command(‘pwd’) # stdin,stdout,stderr = ssh_client.exec_command(‘ls -la’) # stdin,stdout,stderr = ssh_client.exec_command(‘cd /usr/ && pwd’) cmd = ”’ cd /usr ls -la pwd whoami ”’ stdin,stdout,stderr = ssh_client.exec_command(cmd) # 第五步:读取命令输出 output = stdout.read().decode(‘utf-8’) print(f”命令输出结果:{output}”) # 第六步:关闭连接 ssh_client.close() print(“连接已关闭”) 第二阶段:处理命令输出和错误 import paramiko # 创建一个执行命令的函数 def execute_ssh_command(host, user, password, command): ssh = paramiko.SSHClient() ssh.set_missing_host_key_policy(paramiko.AutoAddPolicy()) try: ssh.connect(hostname=host, username=user, password=password) # 执行命令 stdin, stdout, stderr = ssh.exec_command(command) # 等待命令完成,并获取退出状态码 exit_status = stdout.channel.recv_exit_status() # 读取输出 output = stdout.read().decode(‘utf-8’) error_output = stderr.read().decode(‘utf-8’) print(f”命令: {command}”) print(f”退出状态码: {exit_status} (0表示成功)”) if output: print(“输出结果:”) print(output) if error_output: print(“错误信息:”) print(error_output) finally: ssh.close() # 测试不同的命令 commands = [‘pwd’, ‘ls /nonexistent’, ‘date’] for cmd in commands: execute_ssh_command(‘192.168.102.131’, ‘yt’, ‘123.com’, cmd) print(“-” * 50) 第三阶段:传输文件 import paramiko def upload_file(): “””上传文件到服务器””” # 先建立连接 ssh = paramiko.SSHClient() ssh.set_missing_host_key_policy(paramiko.AutoAddPolicy()) ssh.connect(‘服务器IP’, username=’用户名’, password=’密码’) # 打开SFTP会话 sftp = ssh.open_sftp() # 上传本地文件到远程服务器 local_file = ‘test.txt’ # 本地文件 remote_file = ‘/tmp/test.txt’ # 远程路径 sftp.put(local_file, remote_file) print(f”文件上传成功:{local_file} -> {remote_file}”) # 关闭连接 sftp.close() ssh.close() def download_file(): “””从服务器下载文件””” ssh = paramiko.SSHClient() ssh.set_missing_host_key_policy(paramiko.AutoAddPolicy()) ssh.connect(‘服务器IP’, username=’用户名’, password=’密码’) sftp = ssh.open_sftp() # 下载文件 remote_file = ‘/var/log/syslog’ # 远程文件 local_file = ‘syslog_copy.log’ # 保存到本地 sftp.get(remote_file, local_file) print(f”文件下载成功:{remote_file} -> {local_file}”) sftp.close() ssh.close() def list_directory(): “””列出远程目录内容””” ssh = paramiko.SSHClient() ssh.set_missing_host_key_policy(paramiko.AutoAddPolicy()) ssh.connect(‘服务器IP’, username=’用户名’, password=’密码’) sftp = ssh.open_sftp() # 列出目录内容 remote_dir = ‘/tmp’ files = sftp.listdir(remote_dir) print(f”目录 {remote_dir} 中的内容:”) for file in files: print(f” – {file}”) sftp.close() ssh.close() 第四阶段:封装成实用工具 import paramiko class SimpleSSHClient: def __init__(self, host, username, password=None, key_path=None): self.host = host self.username = username self.password = password self.key_path = key_path self.client = None def connect(self): “””建立连接””” self.client = paramiko.SSHClient() self.client.set_missing_host_key_policy(paramiko.AutoAddPolicy()) if self.key_path: # 使用密钥认证 key = paramiko.RSAKey.from_private_key_file(self.key_path) self.client.connect( hostname=self.host, username=self.username, pkey=key ) else: # 使用密码认证 self.client.connect( hostname=self.host, username=self.username, password=self.password ) print(f”已连接到 {self.host}”) def run_command(self, command): “””执行命令并返回结果””” if not self.client: print(“错误:请先调用connect()方法连接”) return None stdin, stdout, stderr = self.client.exec_command(command) # 获取结果 exit_code = stdout.channel.recv_exit_status() output = stdout.read().decode(‘utf-8’) error = stderr.read().decode(‘utf-8’) return { ‘command’: command, ‘exit_code’: exit_code, ‘output’: output, ‘error’: error } def disconnect(self): “””断开连接””” if self.client: self.client.close() print(“连接已关闭”) def upload(self, local_path, remote_path): “””上传文件””” sftp = self.client.open_sftp() sftp.put(local_path, remote_path) sftp.close() print(f”上传完成:{local_path} -> {remote_path}”) def download(self, remote_path, local_path): “””下载文件””” sftp = self.client.open_sftp() sftp.get(remote_path, local_path) sftp.close() print(f”下载完成:{remote_path} -> {local_path}”) # 使用示例 def main(): # 创建客户端(使用密码) ssh = SimpleSSHClient( host=’服务器IP’, username=’用户名’, password=’密码’ ) # 或者使用密钥 # ssh = SimpleSSHClient( # host=’服务器IP’, # username=’用户名’, # key_path=’/path/to/private_key’ # ) # 连接 ssh.connect() # 执行命令 result = ssh.run_command(‘ls -la’) print(f”命令: {result[‘command’]}”) print(f”退出码: {result[‘exit_code’]}”) print(f”输出:n{result[‘output’]}”) # 上传文件 ssh.upload(‘本地文件.txt’, ‘/tmp/远程文件.txt’) # 断开连接 ssh.disconnect() if __name__ == “__main__”: main()
- import redis # 测试连接 try: r = redis.Redis(host=’192.168.102.136′, password=’123.com’,port=6379, db=0) r.ping() print(“✅ Redis 连接成功!”) except Exception as e: print(f”❌ 连接失败: {e}”)
- import redis # 基本连接 r = redis.Redis( host=’192.168.102.136′, # 主机 port=6379, # 端口 db=0, # 数据库编号 password=’123.com’, # 密码(如果有) decode_responses=True # 自动解码为字符串 ) # 连接池方式(推荐) pool = redis.ConnectionPool( host=’localhost’, port=6379, db=0, max_connections=10 # 最大连接数 ) r = redis.Redis(connection_pool=pool)
- import redis # 连接池方式(推荐) pool = redis.ConnectionPool( host=’192.168.102.136′, password=’123.com’, port=6379, db=0, max_connections=10 # 最大连接数 ) r = redis.Redis(connection_pool=pool) # 设置键值对 r.set(‘name’, ‘Alice’) r.set(‘age’, ’25’) r.setex(‘temp_key’, 60, ‘临时数据’) # 60秒后过期 # 获取值 name = r.get(‘name’) print(f”姓名: {name}”) # Alice # 批量处理 r.mset({‘key1′:’value1′,’key2′:’value2’}) values = r.mget([‘key1′,’key2’]) print(f”批量获取:{values}”) # 自增/自减 r.set(‘counter’, 0) r.incr(‘counter’) # 增加到1 r.incrby(‘counter’, 5) # 增加到6 r.decr(‘counter’) # 减少到5 print(r.get(‘counter’)) print(“=”*20) # 列表操作 # 添加元素 r.lpush(‘mylist’, ‘first’) # 左侧插入 r.rpush(‘mylist’, ‘second’) # 右侧插入 r.lpush(‘mylist’, ‘zero’) # 获取元素 print(r.lrange(‘mylist’, 0, -1)) # 获取所有 print(r.lindex(‘mylist’, 1)) # 获取索引1的元素 # 弹出元素 left_item = r.lpop(‘mylist’) right_item = r.rpop(‘mylist’) print(r.lrange(‘mylist’, 0, -1)) # 获取所有 # 列表长度 length = r.llen(‘mylist’) print(length) print(“=”*20) # 设置哈希字段 r.hset(‘user:1001’, ‘name’, ‘Bob’) r.hset(‘user:1001’, ‘age’, 30) r.hset(‘user:1001’, ‘city’, ‘Beijing’) # 批量设置 r.hmset(‘user:1002’, {‘name’: ‘Charlie’, ‘age’: 25}) # 获取字段 name = r.hget(‘user:1001’, ‘name’) print(name) all_fields = r.hgetall(‘user:1001’) print(f”所有字段: {all_fields}”) # 删除字段 r.hdel(‘user:1001’, ‘city’) all_fields = r.hgetall(‘user:1001’) print(f”所有字段: {all_fields}”) # 集合操作 # 添加元素 r.sadd(‘tags’, ‘python’, ‘redis’, ‘database’) r.sadd(‘tags’, ‘python’) # 重复元素不会添加 # 获取所有元素 tags = r.smembers(‘tags’) print(f”标签: Python SSH Redis “) # 集合运算 r.sadd(‘set1’, ‘a’, ‘b’, ‘c’) r.sadd(‘set2’, ‘b’, ‘c’, ‘d’) # 交集 inter = r.sinter(‘set1’, ‘set2’) print(f”交集: {inter}”) # 并集 union = r.sunion(‘set1’, ‘set2’) print(f”并集: {union}”) # 差集 diff = r.sdiff(‘set1’, ‘set2’) print(f”差集: {diff}”) # 有序集合 # 添加带分数的元素 r.zadd(‘scores’, {‘Alice’: 90, ‘Bob’: 85, ‘Charlie’: 95}) # 获取排名 rank = r.zrank(‘scores’, ‘Bob’) # 升序排名 rev_rank = r.zrevrank(‘scores’, ‘Bob’) # 降序排名 # 获取分数范围 top3 = r.zrevrange(‘scores’, 0, 2, withscores=True) print(f”前三名: {top3}”) # 获取分数 score = r.zscore(‘scores’, ‘Alice’) 官方文档:https://redis.io/documentation Python Redis 文档:https://redis-py.readthedocs.io/ 到此这篇关于Python处理SSH和Redis的示例代码详解的文章就介绍到这了,更多相关Python处理SSH和Redis内容请搜索风君子博客以前的文章或继续浏览下面的相关文章希望大家以后多多支持风君子博客! 您可能感兴趣的文章: python 通过SSHTunnelForwarder隧道连接redis的方法 python利用跳板机ssh远程连接redis的方法 一文详解Python是如何处理SSH的 Python自动连接SSH的实现步骤 python操作redis基础 Python中操作Redis的常用方法小结
目录
- 一、Python处理SSH
- 安装第三方库:Paramiko
- Python代码实现
- 二、Python处理Redis
- 1.验证安装
- 2. 连接 Redis
- 3.基础操作
基于Python代码直接可以远程操作Linux服务器(此类技术的运用:利用Python完成远程应用系统部署,远程监控,文件传输,无代理模式)
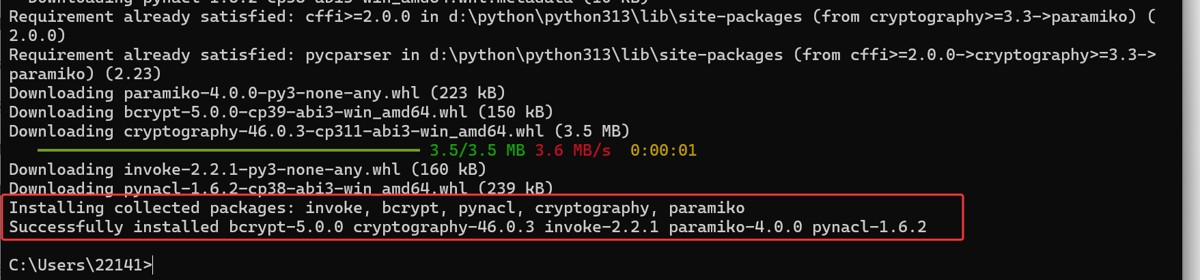
pip install paramiko
第一阶段:最基础的SSH连接
import paramiko

# 第一步:创建SSH客户端
ssh_client = paramiko.SSHClient()

# 第二步:设置自动接受未知主机密钥(学习时使用,生产环境不建议)
ssh_client.set_missing_host_key_policy(paramiko.AutoAddPolicy())

# 第三步:连接到服务器
ssh_client.connect(
    hostname='192.168.102.131',
    port=22,           # SSH默认端口
    username='yt',
    password='123.com'
)

print("连接成功!")

# 第四步:执行一个简单命令
# stdin,stdout,stderr = ssh_client.exec_command('pwd')
# stdin,stdout,stderr = ssh_client.exec_command('ls -la')
# stdin,stdout,stderr = ssh_client.exec_command('cd /usr/ && pwd')
cmd = '''
cd /usr
ls -la
pwd
whoami
'''
stdin,stdout,stderr = ssh_client.exec_command(cmd)

# 第五步:读取命令输出
output = stdout.read().decode('utf-8')
print(f"命令输出结果:{output}")

# 第六步:关闭连接
ssh_client.close()
print("连接已关闭")
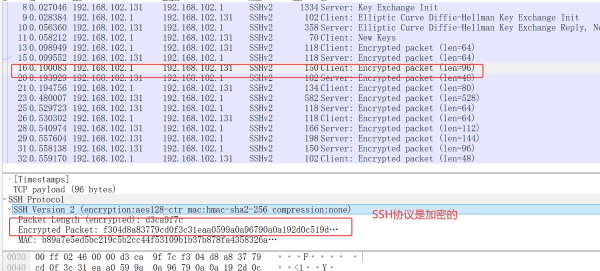
第二阶段:处理命令输出和错误
import paramiko

# 创建一个执行命令的函数
def execute_ssh_command(host, user, password, command):
    ssh = paramiko.SSHClient()
    ssh.set_missing_host_key_policy(paramiko.AutoAddPolicy())

    try:
        ssh.connect(hostname=host, username=user, password=password)

        # 执行命令
        stdin, stdout, stderr = ssh.exec_command(command)

        # 等待命令完成,并获取退出状态码
        exit_status = stdout.channel.recv_exit_status()

        # 读取输出
        output = stdout.read().decode('utf-8')
        error_output = stderr.read().decode('utf-8')

        print(f"命令: {command}")
        print(f"退出状态码: {exit_status} (0表示成功)")

        if output:
            print("输出结果:")
            print(output)

        if error_output:
            print("错误信息:")
            print(error_output)

    finally:
        ssh.close()


# 测试不同的命令
commands = ['pwd', 'ls /nonexistent', 'date']

for cmd in commands:
    execute_ssh_command('192.168.102.131', 'yt', '123.com', cmd)
    print("-" * 50)
第三阶段:传输文件
import paramiko

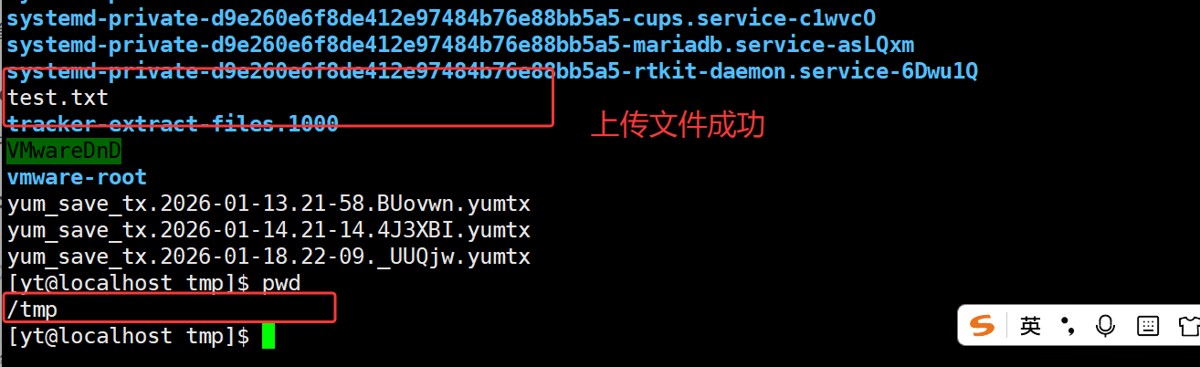
def upload_file():
    """上传文件到服务器"""
    # 先建立连接
    ssh = paramiko.SSHClient()
    ssh.set_missing_host_key_policy(paramiko.AutoAddPolicy())
    ssh.connect('服务器IP', username='用户名', password='密码')

    # 打开SFTP会话
    sftp = ssh.open_sftp()

    # 上传本地文件到远程服务器
    local_file = 'test.txt'        # 本地文件
    remote_file = '/tmp/test.txt'  # 远程路径

    sftp.put(local_file, remote_file)
    print(f"文件上传成功:{local_file} -> {remote_file}")

    # 关闭连接
    sftp.close()
    ssh.close()

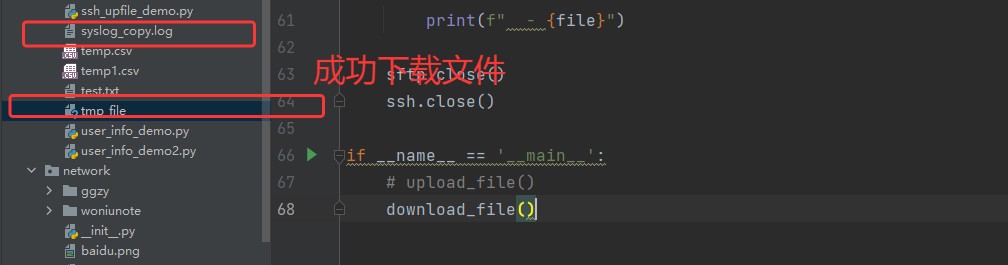
def download_file():
    """从服务器下载文件"""
    ssh = paramiko.SSHClient()
    ssh.set_missing_host_key_policy(paramiko.AutoAddPolicy())
    ssh.connect('服务器IP', username='用户名', password='密码')

    sftp = ssh.open_sftp()

    # 下载文件
    remote_file = '/var/log/syslog'  # 远程文件
    local_file = 'syslog_copy.log'   # 保存到本地

    sftp.get(remote_file, local_file)
    print(f"文件下载成功:{remote_file} -> {local_file}")

    sftp.close()
    ssh.close()

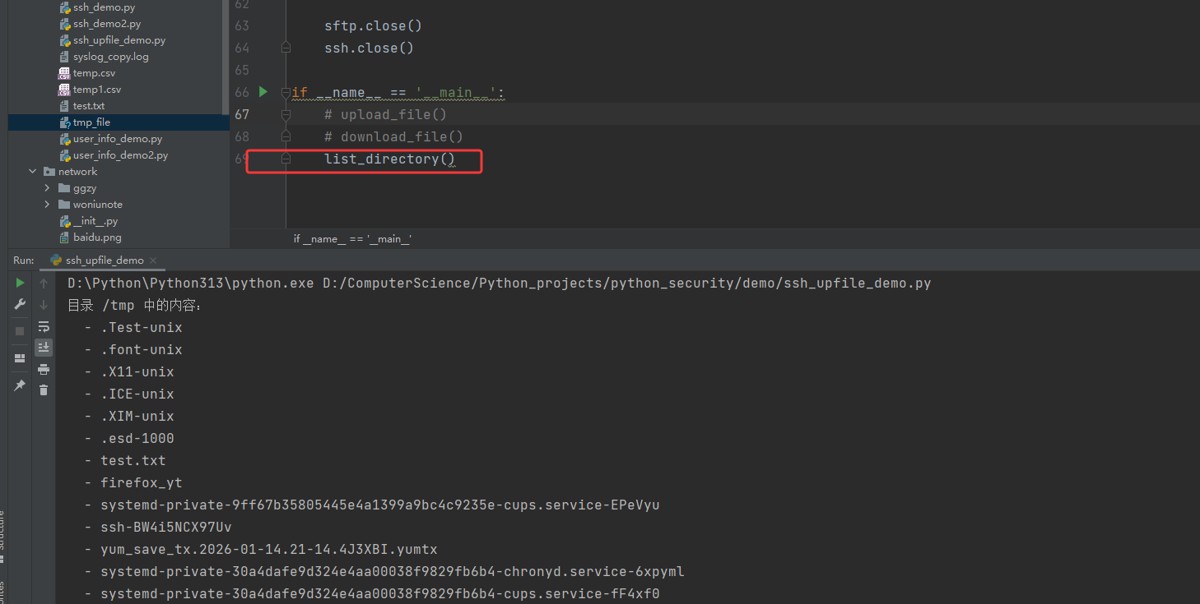
def list_directory():
    """列出远程目录内容"""
    ssh = paramiko.SSHClient()
    ssh.set_missing_host_key_policy(paramiko.AutoAddPolicy())
    ssh.connect('服务器IP', username='用户名', password='密码')

    sftp = ssh.open_sftp()

    # 列出目录内容
    remote_dir = '/tmp'
    files = sftp.listdir(remote_dir)

    print(f"目录 {remote_dir} 中的内容:")
    for file in files:
        print(f"  - {file}")

    sftp.close()
    ssh.close()

第四阶段:封装成实用工具
import paramiko

class SimpleSSHClient:
    def __init__(self, host, username, password=None, key_path=None):
        self.host = host
        self.username = username
        self.password = password
        self.key_path = key_path
        self.client = None

    def connect(self):
        """建立连接"""
        self.client = paramiko.SSHClient()
        self.client.set_missing_host_key_policy(paramiko.AutoAddPolicy())

        if self.key_path:
            # 使用密钥认证
            key = paramiko.RSAKey.from_private_key_file(self.key_path)
            self.client.connect(
                hostname=self.host,
                username=self.username,
                pkey=key
            )
        else:
            # 使用密码认证
            self.client.connect(
                hostname=self.host,
                username=self.username,
                password=self.password
            )
        print(f"已连接到 {self.host}")

    def run_command(self, command):
        """执行命令并返回结果"""
        if not self.client:
            print("错误:请先调用connect()方法连接")
            return None

        stdin, stdout, stderr = self.client.exec_command(command)

        # 获取结果
        exit_code = stdout.channel.recv_exit_status()
        output = stdout.read().decode('utf-8')
        error = stderr.read().decode('utf-8')

        return {
            'command': command,
            'exit_code': exit_code,
            'output': output,
            'error': error
        }

    def disconnect(self):
        """断开连接"""
        if self.client:
            self.client.close()
            print("连接已关闭")

    def upload(self, local_path, remote_path):
        """上传文件"""
        sftp = self.client.open_sftp()
        sftp.put(local_path, remote_path)
        sftp.close()
        print(f"上传完成:{local_path} -> {remote_path}")

    def download(self, remote_path, local_path):
        """下载文件"""
        sftp = self.client.open_sftp()
        sftp.get(remote_path, local_path)
        sftp.close()
        print(f"下载完成:{remote_path} -> {local_path}")

# 使用示例
def main():
    # 创建客户端(使用密码)
    ssh = SimpleSSHClient(
        host='服务器IP',
        username='用户名',
        password='密码'
    )

    # 或者使用密钥
    # ssh = SimpleSSHClient(
    #     host='服务器IP',
    #     username='用户名',
    #     key_path='/path/to/private_key'
    # )

    # 连接
    ssh.connect()

    # 执行命令
    result = ssh.run_command('ls -la')
    print(f"命令: {result['command']}")
    print(f"退出码: {result['exit_code']}")
    print(f"输出:n{result['output']}")

    # 上传文件
    ssh.upload('本地文件.txt', '/tmp/远程文件.txt')

    # 断开连接
    ssh.disconnect()

if __name__ == "__main__":
    main()
import redis
# 测试连接
try:
    r = redis.Redis(host='192.168.102.136', password='123.com',port=6379, db=0)
    r.ping()
    print("✅ Redis 连接成功!")
except Exception as e:
    print(f"❌ 连接失败: {e}")

import redis

# 基本连接
r = redis.Redis(
    host='192.168.102.136',  # 主机
    port=6379,         # 端口
    db=0,              # 数据库编号
    password='123.com',     # 密码(如果有)
    decode_responses=True  # 自动解码为字符串
)

# 连接池方式(推荐)
pool = redis.ConnectionPool(
    host='localhost',
    port=6379,
    db=0,
    max_connections=10  # 最大连接数
)
r = redis.Redis(connection_pool=pool)
import redis

# 连接池方式(推荐)
pool = redis.ConnectionPool(
    host='192.168.102.136',
    password='123.com',
    port=6379,
    db=0,
    max_connections=10  # 最大连接数
)
r = redis.Redis(connection_pool=pool)

# 设置键值对
r.set('name', 'Alice')
r.set('age', '25')
r.setex('temp_key', 60, '临时数据')  # 60秒后过期

# 获取值
name = r.get('name')
print(f"姓名: {name}")  # Alice

# 批量处理
r.mset({'key1':'value1','key2':'value2'})
values = r.mget(['key1','key2'])
print(f"批量获取:{values}")

# 自增/自减
r.set('counter', 0)
r.incr('counter')  # 增加到1
r.incrby('counter', 5)  # 增加到6
r.decr('counter')  # 减少到5
print(r.get('counter'))

print("="*20)
# 列表操作

# 添加元素
r.lpush('mylist', 'first')   # 左侧插入
r.rpush('mylist', 'second')  # 右侧插入
r.lpush('mylist', 'zero')

# 获取元素
print(r.lrange('mylist', 0, -1))  # 获取所有
print(r.lindex('mylist', 1))      # 获取索引1的元素

# 弹出元素
left_item = r.lpop('mylist')
right_item = r.rpop('mylist')
print(r.lrange('mylist', 0, -1))  # 获取所有

# 列表长度
length = r.llen('mylist')
print(length)

print("="*20)

# 设置哈希字段
r.hset('user:1001', 'name', 'Bob')
r.hset('user:1001', 'age', 30)
r.hset('user:1001', 'city', 'Beijing')

# 批量设置
r.hmset('user:1002', {'name': 'Charlie', 'age': 25})

# 获取字段
name = r.hget('user:1001', 'name')
print(name)
all_fields = r.hgetall('user:1001')
print(f"所有字段: {all_fields}")

# 删除字段
r.hdel('user:1001', 'city')
all_fields = r.hgetall('user:1001')
print(f"所有字段: {all_fields}")

# 集合操作
# 添加元素
r.sadd('tags', 'python', 'redis', 'database')
r.sadd('tags', 'python')  # 重复元素不会添加

# 获取所有元素
tags = r.smembers('tags')
print(f"标签:
官方文档:https://redis.io/documentation
Python Redis 文档:https://redis-py.readthedocs.io/
到此这篇关于Python处理SSH和Redis的示例代码详解的文章就介绍到这了,更多相关Python处理SSH和Redis内容请搜索风君子博客以前的文章或继续浏览下面的相关文章希望大家以后多多支持风君子博客!
您可能感兴趣的文章:
- python 通过SSHTunnelForwarder隧道连接redis的方法
- python利用跳板机ssh远程连接redis的方法
- 一文详解Python是如何处理SSH的
- Python自动连接SSH的实现步骤
- python操作redis基础
- Python中操作Redis的常用方法小结