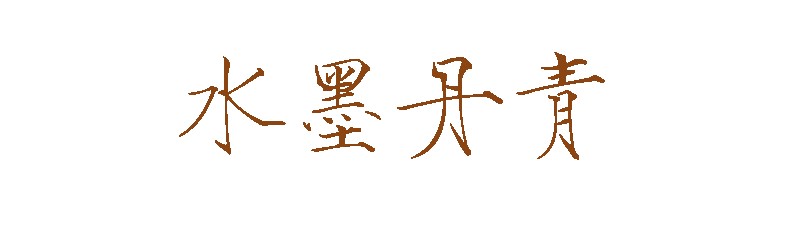
本文介绍了一个使用matplotlib生成书法文字图片的Python方法。通过导入matplotlib库,定义create_calligraphy_with_matplotlib函数,可以指定文本内容、字体路径、输出路径等参数,设置字体属性并绘制书法文字。函数会隐藏坐标轴,保存为透明背景的图片。示例代码演示了如何使用该函数生成"水墨丹青"的书法作品,并可自定义字号和颜色。该方案适合需要将书法文字可视化的应用场景。
效果如下:

完整代码:
import matplotlib.pyplot as plt
import matplotlib.font_manager as fm

def create_calligraphy_with_matplotlib(text, font_path, output_path, size=50, color='black'):
    """
    使用matplotlib生成书法文字图片
    """
    # 设置字体
    prop = fm.FontProperties(fname=font_path, size=size)

    # 创建图形
    fig, ax = plt.subplots(figsize=(10, 3))
    ax.text(0.5, 0.5, text, fontproperties=prop,
            ha='center', va='center', color=color, size=size)

    # 隐藏坐标轴
    ax.axis('off')

    # 保存图片
    plt.savefig(output_path, bbox_inches='tight', pad_inches=0.1, transparent=True)
    plt.close()
    print(f"书法文字图片已保存至: {output_path}")

# 使用示例
if __name__ == "__main__":
    font_path = "DroidSansFallback.ttf"  # 替换为你的书法字体路径
    text = "水墨丹青"
    output_path = "calligraphy_matplotlib.png"

    create_calligraphy_with_matplotlib(text, font_path, output_path, size=80, color='#8B4513')
知识扩展:
下面我们来看看如何使用python 模拟自己的手写字体吧
方式一
1.首先去网站生成自己的字体文件(ttf格式的文件)系统自带的字体文件在:C:WindowsFonts
2.通过代码实现手写字体:
# coding: utf-8
from PIL import Image, ImageFont

from handright import Template, handwrite

text = "你好,世界"

template = Template(
    background=Image.new(mode="1", size=(900, 1000), color=1),
    font=ImageFont.truetype("C:/Windows/Fonts/STLITI.TTF", size=100),
    # line_spacing=150,
    # fill=0,  # 字体“颜色”
    # left_margin=100,
    # top_margin=100,
    # right_margin=100,
    # bottom_margin=100,
    # word_spacing=15,
    # line_spacing_sigma=6,  # 行间距随机扰动
    # font_size_sigma=20,  # 字体大小随机扰动
    # word_spacing_sigma=3,  # 字间距随机扰动
    # end_chars=",。",  # 防止特定字符因排版算法的自动换行而出现在行首
    # perturb_x_sigma=4,  # 笔画横向偏移随机扰动
    # perturb_y_sigma=4,  # 笔画纵向偏移随机扰动
    # perturb_theta_sigma=0.05,  # 笔画旋转偏移随机扰动
)
images = handwrite(text, template)
for i, im in enumerate(images):
    assert isinstance(im, Image.Image)
    im.show()
    # im.save(r"C:Userszhichao{}.webp".format(i))
效果:

感觉不好看,换了几个字体了也一样。
方式二
from requests import get


text = "hello,world"
params = {
    'text': text,
}

if len(text) > 1035:
    print('The content you entered is too long.')
else:
    try:
        res = get('https://pywhatkit.herokuapp.com/handwriting', params=params)
        with open('text.png', 'wb') as f:
            f.write(res.content)
        print('Successful production.')
    except Exception as e:
        print('Error :', e)
效果:
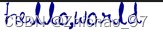
该方式貌似只支持英文。。。
到此这篇关于Python实现生成书法字体的示例代码的文章就介绍到这了,更多相关Python生成书法字体内容请搜索风君子博客以前的文章或继续浏览下面的相关文章希望大家以后多多支持风君子博客!
您可能感兴趣的文章:
- python实现书法碑帖图片分割
- Python实现修改字体字形和提取矢量数据
- python中openpyxl库设置表格样式之字体/边框/对齐/颜色等
- Python在Excel单元格中应用多种字体样式的代码示例
- Python批量调整Word文档中的字体、段落间距及格式
- 基于Python实现一个PDF特殊字体提取工具
- python输出带有颜色字体的三种方法