文章目录
- 你需要为一系列发布到社交媒体或网站的图片统一添加公司名称、版权年份或个人签名,并要求水印样式一致。 编写一个通用的函数,可以批量处理文件夹中的图片,并为每张图片添加自定义样式的文字水印。 from PIL import Image, ImageDraw, ImageFont import os def add_text_watermark_batch(source_folder, output_folder, watermark_text, font_path=”arial.ttf”, font_size=40, text_color=(0, 0, 0, 128), position=”bottom_right”): “”” 批量给指定文件夹下的图片添加文字水印。 这是高效的Python批量添加文字水印脚本。 :param source_folder: 源图片文件夹路径 :param output_folder: 输出文件夹路径 :param watermark_text: 要添加的水印文字 :param font_path: 字体文件路径 (如 “arial.ttf”, “simhei.ttf”) :param font_size: 字体大小 :param text_color: 文本颜色 (R, G, B, Alpha),Alpha为透明度 (0-255) :param position: 水印位置 (“top_left”, “top_right”, “bottom_left”, “bottom_right”, “center”) “”” if not os.path.exists(source_folder): print(f”❌ 源文件夹不存在:{source_folder}”) return os.makedirs(output_folder, exist_ok=True) files = [f for f in os.listdir(source_folder) if os.path.isfile(os.path.join(source_folder, f))] # 尝试加载字体 try: font = ImageFont.truetype(font_path, font_size) except IOError: print(f”⚠️ 字体文件 ‘{font_path}’ 未找到,使用默认字体。”) font = ImageFont.load_default() print(f”🚀 正在批量为 ‘{source_folder}’ 下的图片添加文字水印…”) for filename in files: source_path = os.path.join(source_folder, filename) output_path = os.path.join(output_folder, “watermarked_” + filename) try: img = Image.open(source_path).convert(“RGBA”) # 转换为RGBA支持透明度 draw = ImageDraw.Draw(img) # 获取文字尺寸 (注意:textsize在Pillow 10.0后废弃,推荐textbbox) # 使用textbbox替代textsize for Pillow 10+ bbox = draw.textbbox((0, 0), watermark_text, font=font) text_width = bbox[2] – bbox[0] text_height = bbox[3] – bbox[1] # 根据位置计算水印坐标 if position == “top_left”: x, y = 10, 10 elif position == “top_right”: x, y = img.width – text_width – 10, 10 elif position == “bottom_left”: x, y = 10, img.height – text_height – 10 elif position == “bottom_right”: x, y = img.width – text_width – 10, img.height – text_height – 10 elif position == “center”: x, y = (img.width – text_width) / 2, (img.height – text_height) / 2 else: x, y = img.width – text_width – 10, img.height – text_height – 10 # 默认右下角 draw.text((x, y), watermark_text, font=font, fill=text_color) # 保存图片,如果原始是PNG,可以尝试保存回PNG以保留透明度,否则转JPG if filename.lower().endswith(‘.png’): img.save(output_path) else: img.save(output_path, quality=90) # JPG格式,需要质量参数 print(f”✅ 添加水印:'{filename}’ -> ‘{os.path.basename(output_path)}'”) img.close() except Exception as e: print(f”❌ 添加水印失败:'{filename}’。错误信息:{e}”) print(“✨ 批量添加文字水印完成!”) if __name__ == “__main__”: source_dir = os.path.expanduser(“~/Desktop/待加水印图片”) output_dir = os.path.expanduser(“~/Desktop/已加文字水印”) os.makedirs(source_dir, exist_ok=True) # 准备一些图片到 source_dir (JPG, PNG都可以) # 示例1:批量添加半透明灰色版权声明到右下角 add_text_watermark_batch( source_dir, output_dir, watermark_text=”© Python自动化博主 All Rights Reserved”, font_path=”arial.ttf”, font_size=30, text_color=(128, 128, 128, 150), # 半透明灰色 position=”bottom_right” ) # 示例2:批量添加红色居中“内部资料”水印 # add_text_watermark_batch( # source_dir, # output_dir, # watermark_text=”内部资料,严禁外传”, # font_path=”simhei.ttf”, # 尝试其他字体,如SimHei (黑体) # font_size=50, # text_color=(255, 0, 0, 100), # 半透明红色 # position=”center” # ) 操作步骤: 准备图片: 在桌面创建一个名为待加水印图片的文件夹,放入一些测试图片。 修改代码路径: 修改 source_dir 和 output_dir 为你实际的文件夹路径。 运行: 运行 python ImageTextWatermarkBatch.py。你可以修改水印文字、字体、颜色、透明度和位置来尝试不同效果。 效果展示:
- 我们有的时候需要对所有产品图、宣传图批量加上公司Logo、品牌图标,或者为了推广,为图片添加公众号二维码。手动粘贴Logo不仅慢,还很难保证位置和大小的一致性。 利用Pillow库,我们可以将Logo图片(或二维码)作为水印,批量添加图片水印到你的目标图片上。 from PIL import Image import os def add_image_watermark_batch(source_folder, output_folder, watermark_image_path, position=”bottom_right”, opacity=0.5, size_ratio=0.15): “”” 批量给指定文件夹下的图片添加图片水印(Logo或二维码)。 这是高效的Python批量添加图片水印脚本。 :param source_folder: 源图片文件夹路径 :param output_folder: 输出文件夹路径 :param watermark_image_path: 水印图片(Logo)的路径 (最好是带透明背景的PNG图) :param position: 水印位置 (“top_left”, “top_right”, “bottom_left”, “bottom_right”, “center”, “tile”) “tile” 表示平铺水印 :param opacity: 水印透明度 (0.0-1.0) :param size_ratio: 水印图片相对于主图的尺寸比例 (0.0-1.0) “”” if not os.path.exists(source_folder): print(f”❌ 源文件夹不存在:{source_folder}”) return if not os.path.exists(watermark_image_path): print(f”❌ 水印图片不存在:{watermark_image_path}”) return os.makedirs(output_folder, exist_ok=True) files = [f for f in os.listdir(source_folder) if os.path.isfile(os.path.join(source_folder, f))] try: watermark_img = Image.open(watermark_image_path) # 转换水印图片为RGBA模式,确保透明度正常处理 if watermark_img.mode != ‘RGBA’: watermark_img = watermark_img.convert(‘RGBA’) except Exception as e: print(f”❌ 无法加载水印图片:{e}”) return print(f”🚀 正在批量为 ‘{source_folder}’ 下的图片添加图片水印…”) for filename in files: source_path = os.path.join(source_folder, filename) output_path = os.path.join(output_folder, “watermarked_” + filename) try: main_img = Image.open(source_path).convert(“RGBA”) # 主图也转为RGBA # 调整水印图片大小 # 如果是平铺水印,尺寸比例可以非常小 if position == “tile”: resized_watermark = watermark_img.resize((int(watermark_img.width * size_ratio / 5), int(watermark_img.height * size_ratio / 5)), Image.LANCZOS) else: resized_watermark = watermark_img.resize((int(main_img.width * size_ratio), int(main_img.height * size_ratio)), Image.LANCZOS) # 调整水印透明度 alpha = resized_watermark.split()[-1] # 获取透明通道 alpha = Image.eval(alpha, lambda x: x * opacity) # 调整透明度 resized_watermark.putalpha(alpha) # 根据位置计算粘贴坐标 if position == “top_left”: x, y = 10, 10 elif position == “top_right”: x, y = main_img.width – resized_watermark.width – 10, 10 elif position == “bottom_left”: x, y = 10, main_img.height – resized_watermark.height – 10 elif position == “bottom_right”: x, y = main_img.width – resized_watermark.width – 10, main_img.height – resized_watermark.height – 10 elif position == “center”: x, y = (main_img.width – resized_watermark.width) // 2, (main_img.height – resized_watermark.height) // 2 elif position == “tile”: # 平铺水印 for i in range(0, main_img.width + resized_watermark.width, resized_watermark.width + 50): # 50为水印间距 for j in range(0, main_img.height + resized_watermark.height, resized_watermark.height + 50): main_img.alpha_composite(resized_watermark, (i, j)) # 平铺完成后直接保存,跳过下面的单次粘贴 main_img.save(output_path) print(f”✅ 添加平铺水印:'{filename}’ -> ‘{os.path.basename(output_path)}'”) main_img.close() continue # 跳到下一个文件 # 单次水印粘贴 (非平铺模式) main_img.alpha_composite(resized_watermark, (x, y)) # 将水印粘贴到主图上 # 保存图片,如果原始是PNG且有透明度需求,可以尝试保存回PNG,否则转JPG if filename.lower().endswith(‘.png’) and Image.open(source_path).mode == ‘RGBA’: main_img.save(output_path) else: main_img.save(output_path, quality=90) # JPG格式 print(f”✅ 添加水印:'{filename}’ -> ‘{os.path.basename(output_path)}'”) main_img.close() except Exception as e: print(f”❌ 添加水印失败:'{filename}’。错误信息:{e}”) watermark_img.close() # 关闭水印图片 print(“✨ 批量添加图片水印完成!”) if __name__ == “__main__”: source_dir = os.path.expanduser(“~/Desktop/待加Logo图片”) output_dir = os.path.expanduser(“~/Desktop/已加Logo水印”) watermark_file = os.path.expanduser(“~/Desktop/my_logo.png”) # 你的Logo图片路径 (建议PNG透明背景) os.makedirs(source_dir, exist_ok=True) # 准备测试图片到 source_dir,准备一个Logo图片到桌面 # 示例1:批量添加右下角半透明Logo add_image_watermark_batch( source_dir, output_dir, watermark_file, position=”bottom_right”, opacity=0.6, # 60%透明度 size_ratio=0.15 # 水印大小为主图的15% ) # 示例2:批量添加平铺水印(适合防盗图) # add_image_watermark_batch( # source_dir, # output_dir, # watermark_file, # position=”tile”, # opacity=0.1, # 平铺水印通常透明度更低 # size_ratio=0.5 # 平铺水印的单个水印尺寸可以更大一些 # ) 操作步骤: 准备图片: 创建一个名为待加Logo图片的文件夹,放入一些测试图片。 准备Logo: 准备一个Logo图片(最好是透明背景的PNG格式),命名为my_logo.png,放在桌面。 修改代码路径: 修改 source_dir、output_dir 和 watermark_file。 运行: 运行 python ImageImageWatermarkBatch.py。你可以修改水印位置、透明度和大小比例来尝试不同效果。 效果展示:
- type: “text” # 文字水印规则 enabled: true # 是否启用此规则 text: “© 你的公司名称 / 你的个人品牌” # 水印文字内容 font_path: “arial.ttf” # 字体文件路径,确保系统有该字体或提供完整路径 font_size: 30 text_color: [0, 0, 0, 128] # 文字颜色 (R, G, B, Alpha透明度0-255) position: “bottom_right” # 位置: top_left, top_right, bottom_left, bottom_right, center
- type: “image” # 图片水印规则 (如Logo, 二维码) enabled: false # 是否启用此规则 watermark_image_path: “~/Desktop/your_logo.png” # 你的Logo图片路径 (建议PNG透明背景) position: “bottom_left” # 位置: top_left, top_right, bottom_left, bottom_right, center, tile (平铺) opacity: 0.7 # 透明度 (0.0-1.0) size_ratio: 0.1 # 水印图片相对于主图的尺寸比例 (0.0-1.0) 主要程序展示 from PIL import Image, ImageDraw, ImageFont import os import yaml import shutil 以下是前面章节中讲解的各项加水印功能函数,请确保它们都已复制到这里,这里演示大致思路。 def _apply_single_watermark(img_obj, watermark_config, img_path): “”” 根据单个水印规则给图片对象添加水印。 :param img_obj: PIL图片对象 :param watermark_config: 单个水印规则字典 :param img_path: 原始图片路径 (用于日志和错误处理) “”” w_type = watermark_config.get(“type”) if not watermark_config.get(“enabled”, True): # 检查是否启用 return img_obj # 未启用,返回原图 if w_type == “text”: text_content = watermark_config.get(“text”, “”) font_path = watermark_config.get(“font_path”, “arial.ttf”) font_size = watermark_config.get(“font_size”, 30) text_color = tuple(watermark_config.get(“text_color”, [0, 0, 0, 128])) position = watermark_config.get(“position”, “bottom_right”) draw = ImageDraw.Draw(img_obj) try: font = ImageFont.truetype(font_path, font_size) except IOError: print(f”⚠️ 字体文件 ‘{font_path}’ 未找到,使用默认字体。”) font = ImageFont.load_default() # 计算文字位置 bbox = draw.textbbox((0, 0), text_content, font=font) text_width = bbox[2] – bbox[0] text_height = bbox[3] – bbox[1] x, y = 0, 0 if position == “top_left”: x, y = 10, 10 elif position == “top_right”: x, y = img_obj.width – text_width – 10, 10 elif position == “bottom_left”: x, y = 10, img_obj.height – text_height – 10 elif position == “bottom_right”: x, y = img_obj.width – text_width – 10, img_obj.height – text_height – 10 elif position == “center”: x, y = (img_obj.width – text_width) // 2, (img_obj.height – text_height) // 2 draw.text((x, y), text_content, font=font, fill=text_color) print(f” – 添加文字水印: ‘{text_content}'”) return img_obj # 返回处理后的图片对象 elif w_type == “image”: watermark_img_path = watermark_config.get(“watermark_image_path”) position = watermark_config.get(“position”, “bottom_right”) opacity = watermark_config.get(“opacity”, 0.5) size_ratio = watermark_config.get(“size_ratio”, 0.15) if not os.path.exists(watermark_img_path): print(f”❌ 水印图片文件不存在:{watermark_img_path}”) return img_obj return img_obj def run_watermark_processor(config_path): “”” 运行图片水印处理器,根据配置文件批量添加水印。 这是你的“图片批量加水印神器”的核心。 :param config_path: 配置文件的路径 “”” try: with open(config_path, ‘r’, encoding=’utf-8′) as f: config = yaml.safe_load(f) except FileNotFoundError: print(f”❌ 配置文件未找到:{config_path}”) return except yaml.YAMLError as e: print(f”❌ 配置文件解析错误:{e}”) return source_dir = os.path.expanduser(config.get(“source_directory”)) output_dir = os.path.expanduser(config.get(“output_directory”)) if __name__ == “__main__”: # 确保 config_watermark.yaml 在同一目录下 config_file_path = os.path.join(os.path.dirname(__file__), “config_watermark.yaml”) run_watermark_processor(config_file_path) 操作步骤: 准备环境: 确保你已经安装了Pillow (pip install Pillow) 和 PyYAML (pip install pyyaml)。 创建文件: 创建一个源文件夹,放入各种你希望处理的图片文件。 准备Logo(如果使用图片水印): 准备一个Logo图片(最好是透明背景的PNG格式),命名为your_logo.png,放在与watermark_processor_main.py和config_watermark.yaml同一目录下。 保存代码: 将上面的 watermark_processor_main.py 和 config_watermark.yaml 两个文件保存到同一个目录下。 修改配置: 打开 config_watermark.yaml,根据你实际的文件夹路径修改 source_directory 和 output_directory。启用/禁用你需要的文字水印或图片水印规则,并调整其参数(文字内容、字体、颜色、位置,或Logo路径、透明度、大小)。 运行: 在终端中进入 watermark_processor_main.py 所在的目录,运行 python watermark_processor_main.py。 下面是批量加水印流程演示图: A[开始] –> B{加载 config_watermark.yaml}; B –> C[获取源文件夹图片列表]; C — 遍历每张图片 –> D{打开图片,转为RGBA模式}; D — 检查 watermark_rules –> E{对每条启用规则}; E — text –> F[添加文字水印]; E — image –> G[添加图片水印]; F –> H[将处理后的图片保存到输出目录]; G –> H; H –> I[处理下一个图片]; I — 所有图片处理完毕 –> J[结束]; 告别手动P图,你的视觉内容从此自带“版权”! 恭喜你!通过本篇文章,你已经掌握了Python图片处理的又一项强大魔法——图片批量加水印!我们从图片版权保护和品牌宣传的痛点出发,学会了如何: Pillow库与ImageDraw: 掌握Python绘制文字和图形的核心工具。 Python批量添加文字水印: 自定义水印文字、字体、颜色、透明度和位置,为你的图片打上专属标签。 Python批量添加图片水印: 轻松叠加Logo、二维码等图片水印,提升品牌辨识度。 构建可配置工具: 通过简单的配置文件,一键管理你的所有图片加水印需求。 现在,你不再需要手动打开PS,一张张为图片加水印。你只需准备好图片和水印素材,修改一下配置文件,运行脚本,你的海量作品就能一键拥有版权信息或品牌Logo,实现高效的图片自动化!让你的视觉内容更专业、更安全! 除了水印,你还希望Python能帮你实现哪些图片处理的自动化功能?比如批量裁剪、智能调色,或者图片风格转换?你会在哪些场景下使用这个批量加水印神器? 以上就是基于Python实现图片批量加水印的方法的详细内容,更多关于Python图片批量加水印的资料请关注风君子博客其它相关文章! 您可能感兴趣的文章: 基于Python实现一个图片水印批量添加工具 Python实现为图片批量添加随机水印 Python操作word实现添加文字或图片水印 Python实现给图片添加文字或图片水印 Python实现为图片添加水印的示例详解
目录
- 1. 图片水印核心利器:Python Pillow库与ImageDraw
- 1.1 给图片加上你的“名字”——文字水印
- 2. Python批量加水印:你的图片版权保护神器!
- 2.1 批量添加文字水印:字体、颜色、透明度、位置随心定!
- 2.2 批量添加图片水印:Logo、二维码,品牌宣传一步到位!
- 3. 实战:你的“图片批量加水印神器”可视化工具雏形
- config_watermark.yaml – 你的图片批量加水印配置
- — 文件夹路径配置 —
- 水印规则配置
- 可以同时启用或禁用文字水印和图片水印规则 watermark_rules:
- offset: [10, 10] # 可选:在position基础上再偏移像素 [x, y]
原创作品被盗用?是时候给你的图片加个“专属烙印”了!
我们经常有有这样的经历?
辛辛苦苦制作的原创图片、精心拍摄的作品、耗费心血设计的宣传图……刚发布到网上,没过多久,就发现被别人盗用维 权耗时耗力,让人沮丧。

除了版权保护,你可能还希望:
为公司所有宣传图加上统一的品牌Logo,提升专业度。
为教育课件或资料图加上“仅供学习使用”的文字水印。
为批量生成的二维码图加上你的公众号名称。
面对成百上千张图片,手动打开Photoshop或在线工具,一张张添加水印,调整位置、透明度……这简直是效率的噩梦!你甚至会因此放弃给图片加水印,从而让你的作品面临被盗用的风险。
是时候让Python出马,为你彻底解决这些烦恼了!今天,我们将深入Python图片处理的世界,手把手教你如何打造一套Python图片自动化的终极指南,让你轻松实现:
- Python批量添加文字水印: 自定义字体、颜色、大小、透明度,让你的版权声明清晰可见。
- Python批量添加图片水印: 轻松叠加Logo、二维码,提升品牌辨识度。
- 一键式批量加水印: 告别手动操作,高效保护你的每一张作品!

准备好了吗?让我们一起告别手动P图,开启高效的图片版权保护新篇章!
要实现Python图片加水印,我们依然需要用到强大的Pillow库。而Pillow中的一个重要模块——ImageDraw,正是实现文字和图形绘制的关键。
Pillow的ImageDraw模块允许你在图片上“画画”和“写字”。我们可以利用它在图片上绘制文字或粘贴另一张图片(Logo),从而实现水印功能。
依然首先需要安装pillow
pip install Pillow
from PIL import Image, ImageDraw, ImageFont # 导入Image, ImageDraw, ImageFont模块
import os

def add_text_watermark_basic(image_path, text="您的版权声明", output_folder="watermarked_images"):
    """
    给单张图片添加文字水印,这是Python图片加水印的基础。
    :param image_path: 源图片文件路径
    :param text: 要添加的水印文字
    :param output_folder: 输出文件夹
    """
    if not os.path.exists(image_path):
        print(f"❌ 图片文件不存在:{image_path}")
        return

    os.makedirs(output_folder, exist_ok=True) # 确保输出文件夹存在

    try:
        img = Image.open(image_path).convert("RGBA") # 转换为RGBA模式,支持透明度
        draw = ImageDraw.Draw(img) # 创建一个绘图对象

        # 设置字体和大小 (请根据你的系统和需求调整字体文件路径)
        # 例如 Windows: "C:/Windows/Fonts/simhei.ttf" (黑体) 或 "arial.ttf"
        try:
            font = ImageFont.truetype("C:/Windows/Fonts/simhei.ttf", 40) # 使用黑体支持中文
        except IOError:
            print("字体文件未找到,将使用默认字体。")
            font = ImageFont.load_default() # 如果找不到,加载默认字体

        # 设置水印位置(右下角)
        bbox = draw.textbbox((0, 0), text, font=font)  # 获取文字边界
        text_width = bbox[2] - bbox[0]
        text_height = bbox[3] - bbox[1]
        # 计算文字绘制位置,距离右下角20像素
        x = img.width - text_width - 20
        y = img.height - text_height - 20

        # 设置文字颜色和透明度 (R, G, B, Alpha)
        # 这里创建一个半透明的灰色文字 (128是透明度,0-255)
        text_color = (128, 128, 128, 128)

        # 绘制文字
        draw.text((x, y), text, font=font, fill=text_color)

        # 保存图片
        output_path = os.path.join(output_folder, "watermarked_" + os.path.basename(image_path))
        # 保存为PNG以保留透明度,如果保存为JPG,透明度会变成白色背景
        img.save(output_path)
        print(f"✅ 图片已添加文字水印并保存到:{output_path}")

        img.close()
    except Exception as e:
        print(f"❌ 处理图片失败:{e}")

if __name__ == "__main__":
    # 请替换为你的实际图片路径
    test_image_path = os.path.expanduser("D:\lx\fengjing.png")
    output_dir = os.path.expanduser("D:\lx\watermarked_images")

    # 确保有测试图片
    if not os.path.exists(test_image_path):
        print(f"请在 '{os.path.dirname(test_image_path)}' 放置一个名为 'my_original_photo.jpg' 的图片文件进行测试。")
    else:
        add_text_watermark_basic(test_image_path, text="爱分享的飘哥", output_folder=output_dir)
操作步骤:
准备图片: 在所在路径下,比如我是在D:lx 下面准备一张

修改代码路径和水印文字: 复制上方代码到VS Code,保存为ImageWater.py。修改 test_image_path、output_dir 和 text。
运行: 在VS Code终端运行 python add_watermark_basic.py。
效果展示:
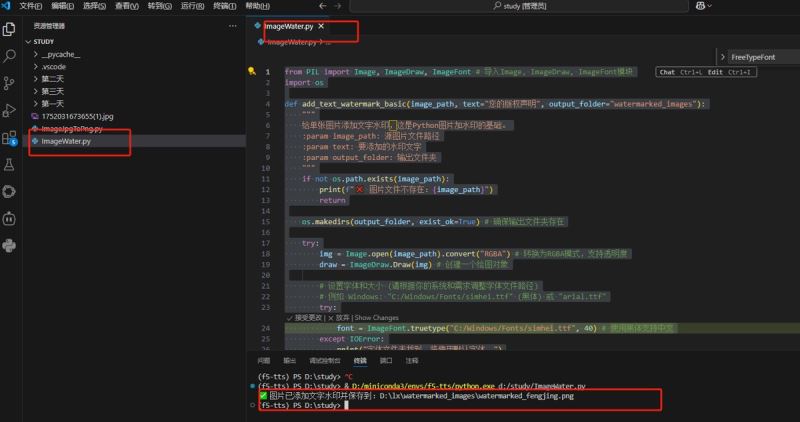
最终结果:

现在,你已经掌握了单张图片加水印的方法。但是,如果图片有上百张,甚至上千张呢?当然是Python批量加水印!我们将把这个功能自动化,实现一键添加版权或Logo,成为你专属的图片版权保护神器。
封装水印逻辑,遍历文件夹下的所有图片,并应用水印。我们将实现两种最常用的批量加水印方式:文字水印和图片Logo水印。
你需要为一系列发布到社交媒体或网站的图片统一添加公司名称、版权年份或个人签名,并要求水印样式一致。
编写一个通用的函数,可以批量处理文件夹中的图片,并为每张图片添加自定义样式的文字水印。
from PIL import Image, ImageDraw, ImageFont
import os

def add_text_watermark_batch(source_folder, output_folder, watermark_text,
                             font_path="arial.ttf", font_size=40,
                             text_color=(0, 0, 0, 128), position="bottom_right"):
    """
    批量给指定文件夹下的图片添加文字水印。
    这是高效的Python批量添加文字水印脚本。
    :param source_folder: 源图片文件夹路径
    :param output_folder: 输出文件夹路径
    :param watermark_text: 要添加的水印文字
    :param font_path: 字体文件路径 (如 "arial.ttf", "simhei.ttf")
    :param font_size: 字体大小
    :param text_color: 文本颜色 (R, G, B, Alpha),Alpha为透明度 (0-255)
    :param position: 水印位置 ("top_left", "top_right", "bottom_left", "bottom_right", "center")
    """
    if not os.path.exists(source_folder):
        print(f"❌ 源文件夹不存在:{source_folder}")
        return

    os.makedirs(output_folder, exist_ok=True)
    files = [f for f in os.listdir(source_folder) if os.path.isfile(os.path.join(source_folder, f))]

    # 尝试加载字体
    try:
        font = ImageFont.truetype(font_path, font_size)
    except IOError:
        print(f"⚠️ 字体文件 '{font_path}' 未找到,使用默认字体。")
        font = ImageFont.load_default()

    print(f"🚀 正在批量为 '{source_folder}' 下的图片添加文字水印...")
    for filename in files:
        source_path = os.path.join(source_folder, filename)
        output_path = os.path.join(output_folder, "watermarked_" + filename)

        try:
            img = Image.open(source_path).convert("RGBA") # 转换为RGBA支持透明度
            draw = ImageDraw.Draw(img)

            # 获取文字尺寸 (注意:textsize在Pillow 10.0后废弃,推荐textbbox)
            # 使用textbbox替代textsize for Pillow 10+
            bbox = draw.textbbox((0, 0), watermark_text, font=font)
            text_width = bbox[2] - bbox[0]
            text_height = bbox[3] - bbox[1]

            # 根据位置计算水印坐标
            if position == "top_left":
                x, y = 10, 10
            elif position == "top_right":
                x, y = img.width - text_width - 10, 10
            elif position == "bottom_left":
                x, y = 10, img.height - text_height - 10
            elif position == "bottom_right":
                x, y = img.width - text_width - 10, img.height - text_height - 10
            elif position == "center":
                x, y = (img.width - text_width) / 2, (img.height - text_height) / 2
            else:
                x, y = img.width - text_width - 10, img.height - text_height - 10 # 默认右下角

            draw.text((x, y), watermark_text, font=font, fill=text_color)

            # 保存图片,如果原始是PNG,可以尝试保存回PNG以保留透明度,否则转JPG
            if filename.lower().endswith('.png'):
                img.save(output_path)
            else:
                img.save(output_path, quality=90) # JPG格式,需要质量参数

            print(f"✅ 添加水印:'{filename}' -> '{os.path.basename(output_path)}'")
            img.close()
        except Exception as e:
            print(f"❌ 添加水印失败:'{filename}'。错误信息:{e}")
    print("✨ 批量添加文字水印完成!")

if __name__ == "__main__":
    source_dir = os.path.expanduser("~/Desktop/待加水印图片")
    output_dir = os.path.expanduser("~/Desktop/已加文字水印")
    os.makedirs(source_dir, exist_ok=True)

    # 准备一些图片到 source_dir (JPG, PNG都可以)

    # 示例1:批量添加半透明灰色版权声明到右下角
    add_text_watermark_batch(
        source_dir,
        output_dir,
        watermark_text="© Python自动化博主 All Rights Reserved",
        font_path="arial.ttf",
        font_size=30,
        text_color=(128, 128, 128, 150), # 半透明灰色
        position="bottom_right"
    )

    # 示例2:批量添加红色居中“内部资料”水印
    # add_text_watermark_batch(
    #     source_dir,
    #     output_dir,
    #     watermark_text="内部资料,严禁外传",
    #     font_path="simhei.ttf", # 尝试其他字体,如SimHei (黑体)
    #     font_size=50,
    #     text_color=(255, 0, 0, 100), # 半透明红色
    #     position="center"
    # )
操作步骤:
准备图片: 在桌面创建一个名为待加水印图片的文件夹,放入一些测试图片。
修改代码路径: 修改 source_dir 和 output_dir 为你实际的文件夹路径。
运行: 运行 python ImageTextWatermarkBatch.py。你可以修改水印文字、字体、颜色、透明度和位置来尝试不同效果。
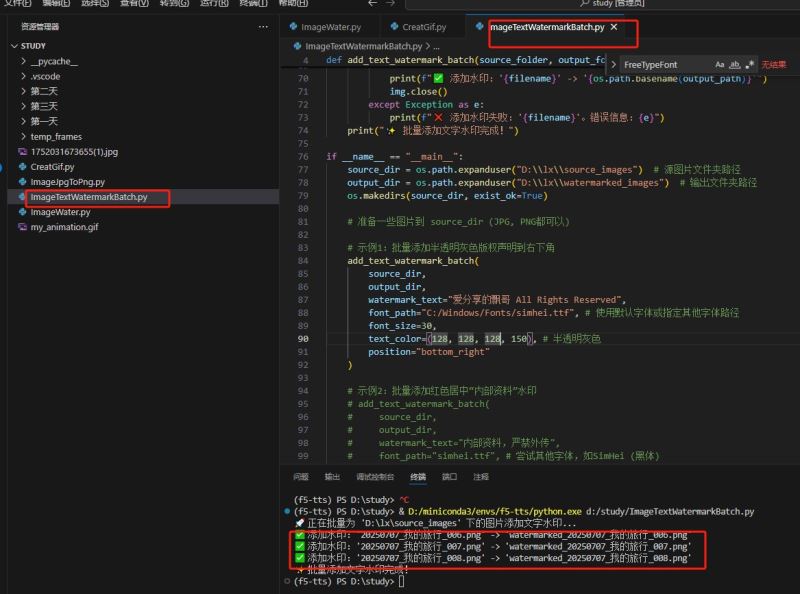
效果展示:

我们有的时候需要对所有产品图、宣传图批量加上公司Logo、品牌图标,或者为了推广,为图片添加公众号二维码。手动粘贴Logo不仅慢,还很难保证位置和大小的一致性。
利用Pillow库,我们可以将Logo图片(或二维码)作为水印,批量添加图片水印到你的目标图片上。
from PIL import Image
import os

def add_image_watermark_batch(source_folder, output_folder, watermark_image_path,
                              position="bottom_right", opacity=0.5, size_ratio=0.15):
    """
    批量给指定文件夹下的图片添加图片水印(Logo或二维码)。
    这是高效的Python批量添加图片水印脚本。
    :param source_folder: 源图片文件夹路径
    :param output_folder: 输出文件夹路径
    :param watermark_image_path: 水印图片(Logo)的路径 (最好是带透明背景的PNG图)
    :param position: 水印位置 ("top_left", "top_right", "bottom_left", "bottom_right", "center", "tile")
                    "tile" 表示平铺水印
    :param opacity: 水印透明度 (0.0-1.0)
    :param size_ratio: 水印图片相对于主图的尺寸比例 (0.0-1.0)
    """
    if not os.path.exists(source_folder):
        print(f"❌ 源文件夹不存在:{source_folder}")
        return
    if not os.path.exists(watermark_image_path):
        print(f"❌ 水印图片不存在:{watermark_image_path}")
        return

    os.makedirs(output_folder, exist_ok=True)
    files = [f for f in os.listdir(source_folder) if os.path.isfile(os.path.join(source_folder, f))]

    try:
        watermark_img = Image.open(watermark_image_path)
        # 转换水印图片为RGBA模式,确保透明度正常处理
        if watermark_img.mode != 'RGBA':
            watermark_img = watermark_img.convert('RGBA')
    except Exception as e:
        print(f"❌ 无法加载水印图片:{e}")
        return

    print(f"🚀 正在批量为 '{source_folder}' 下的图片添加图片水印...")
    for filename in files:
        source_path = os.path.join(source_folder, filename)
        output_path = os.path.join(output_folder, "watermarked_" + filename)

        try:
            main_img = Image.open(source_path).convert("RGBA") # 主图也转为RGBA

            # 调整水印图片大小
            # 如果是平铺水印,尺寸比例可以非常小
            if position == "tile":
                resized_watermark = watermark_img.resize((int(watermark_img.width * size_ratio / 5), int(watermark_img.height * size_ratio / 5)), Image.LANCZOS)
            else:
                resized_watermark = watermark_img.resize((int(main_img.width * size_ratio), int(main_img.height * size_ratio)), Image.LANCZOS)

            # 调整水印透明度
            alpha = resized_watermark.split()[-1] # 获取透明通道
            alpha = Image.eval(alpha, lambda x: x * opacity) # 调整透明度
            resized_watermark.putalpha(alpha)

            # 根据位置计算粘贴坐标
            if position == "top_left":
                x, y = 10, 10
            elif position == "top_right":
                x, y = main_img.width - resized_watermark.width - 10, 10
            elif position == "bottom_left":
                x, y = 10, main_img.height - resized_watermark.height - 10
            elif position == "bottom_right":
                x, y = main_img.width - resized_watermark.width - 10, main_img.height - resized_watermark.height - 10
            elif position == "center":
                x, y = (main_img.width - resized_watermark.width) // 2, (main_img.height - resized_watermark.height) // 2
            elif position == "tile": # 平铺水印
                for i in range(0, main_img.width + resized_watermark.width, resized_watermark.width + 50): # 50为水印间距
                    for j in range(0, main_img.height + resized_watermark.height, resized_watermark.height + 50):
                        main_img.alpha_composite(resized_watermark, (i, j))
                # 平铺完成后直接保存,跳过下面的单次粘贴
                main_img.save(output_path)
                print(f"✅ 添加平铺水印:'{filename}' -> '{os.path.basename(output_path)}'")
                main_img.close()
                continue # 跳到下一个文件

            # 单次水印粘贴 (非平铺模式)
            main_img.alpha_composite(resized_watermark, (x, y)) # 将水印粘贴到主图上

            # 保存图片,如果原始是PNG且有透明度需求,可以尝试保存回PNG,否则转JPG
            if filename.lower().endswith('.png') and Image.open(source_path).mode == 'RGBA':
                main_img.save(output_path)
            else:
                main_img.save(output_path, quality=90) # JPG格式

            print(f"✅ 添加水印:'{filename}' -> '{os.path.basename(output_path)}'")
            main_img.close()
        except Exception as e:
            print(f"❌ 添加水印失败:'{filename}'。错误信息:{e}")
    watermark_img.close() # 关闭水印图片
    print("✨ 批量添加图片水印完成!")

if __name__ == "__main__":
    source_dir = os.path.expanduser("~/Desktop/待加Logo图片")
    output_dir = os.path.expanduser("~/Desktop/已加Logo水印")
    watermark_file = os.path.expanduser("~/Desktop/my_logo.png") # 你的Logo图片路径 (建议PNG透明背景)

    os.makedirs(source_dir, exist_ok=True)

    # 准备测试图片到 source_dir,准备一个Logo图片到桌面

    # 示例1:批量添加右下角半透明Logo
    add_image_watermark_batch(
        source_dir,
        output_dir,
        watermark_file,
        position="bottom_right",
        opacity=0.6,    # 60%透明度
        size_ratio=0.15 # 水印大小为主图的15%
    )

    # 示例2:批量添加平铺水印(适合防盗图)
    # add_image_watermark_batch(
    #     source_dir,
    #     output_dir,
    #     watermark_file,
    #     position="tile",
    #     opacity=0.1,    # 平铺水印通常透明度更低
    #     size_ratio=0.5 # 平铺水印的单个水印尺寸可以更大一些
    # )
操作步骤:
- 准备图片: 创建一个名为待加Logo图片的文件夹,放入一些测试图片。
- 准备Logo: 准备一个Logo图片(最好是透明背景的PNG格式),命名为my_logo.png,放在桌面。
- 修改代码路径: 修改 source_dir、output_dir 和 watermark_file。
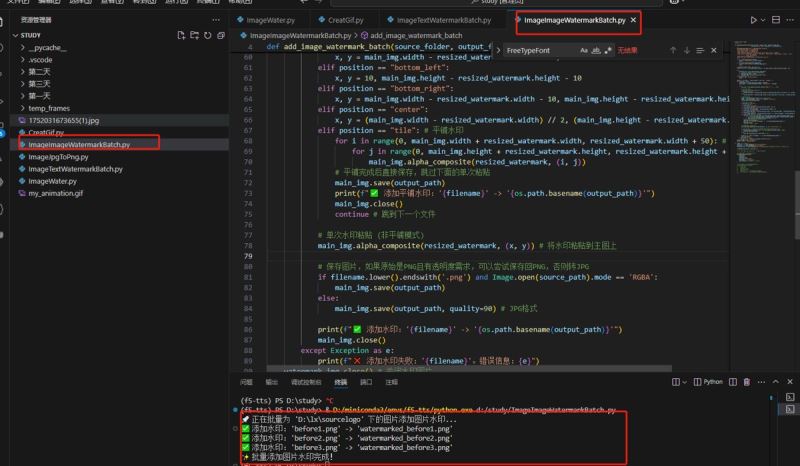
运行: 运行 python ImageImageWatermarkBatch.py。你可以修改水印位置、透明度和大小比例来尝试不同效果。
效果展示:

现在,你已经掌握了Python批量图片加水印的各项核心技巧。是时候将这些能力整合,构建一个属于你的图片批量加水印神器”自动化工具了!就像我们之前的“一键文件整理器”一样,这个工具也将是可配置、易操作的。
核心理念: 提供一个统一的Python脚本,通过修改一个config_watermark.yaml配置文件,就能同时控制文字水印和图片水印的各种参数,实现一键式图片版权保护。
config_watermark.yaml (配置文件示例,与 watermark_processor_main.py 放在同一目录):
source_directory: “D:lxsourcelogo待加水印图片源”
output_directory: “D:lxdestlogo已加水印图片结果”
type: “text” # 文字水印规则
enabled: true # 是否启用此规则
text: “© 你的公司名称 / 你的个人品牌” # 水印文字内容
font_path: “arial.ttf” # 字体文件路径,确保系统有该字体或提供完整路径
font_size: 30
text_color: [0, 0, 0, 128] # 文字颜色 (R, G, B, Alpha透明度0-255)
position: “bottom_right” # 位置: top_left, top_right, bottom_left, bottom_right, center
type: “image” # 图片水印规则 (如Logo, 二维码)
enabled: false # 是否启用此规则
watermark_image_path: “~/Desktop/your_logo.png” # 你的Logo图片路径 (建议PNG透明背景)
position: “bottom_left” # 位置: top_left, top_right, bottom_left, bottom_right, center, tile (平铺)
opacity: 0.7 # 透明度 (0.0-1.0)
size_ratio: 0.1 # 水印图片相对于主图的尺寸比例 (0.0-1.0)
主要程序展示
from PIL import Image, ImageDraw, ImageFont
import os
import yaml
import shutil
以下是前面章节中讲解的各项加水印功能函数,请确保它们都已复制到这里,这里演示大致思路。
def _apply_single_watermark(img_obj, watermark_config, img_path):
    """
    根据单个水印规则给图片对象添加水印。
    :param img_obj: PIL图片对象
    :param watermark_config: 单个水印规则字典
    :param img_path: 原始图片路径 (用于日志和错误处理)
    """
    w_type = watermark_config.get("type")

    if not watermark_config.get("enabled", True): # 检查是否启用
        return img_obj # 未启用,返回原图

    if w_type == "text":
        text_content = watermark_config.get("text", "")
        font_path = watermark_config.get("font_path", "arial.ttf")
        font_size = watermark_config.get("font_size", 30)
        text_color = tuple(watermark_config.get("text_color", [0, 0, 0, 128]))
        position = watermark_config.get("position", "bottom_right")

        draw = ImageDraw.Draw(img_obj)
        try:
            font = ImageFont.truetype(font_path, font_size)
        except IOError:
            print(f"⚠️ 字体文件 '{font_path}' 未找到,使用默认字体。")
            font = ImageFont.load_default()

        # 计算文字位置
        bbox = draw.textbbox((0, 0), text_content, font=font)
        text_width = bbox[2] - bbox[0]
        text_height = bbox[3] - bbox[1]

        x, y = 0, 0
        if position == "top_left": x, y = 10, 10
        elif position == "top_right": x, y = img_obj.width - text_width - 10, 10
        elif position == "bottom_left": x, y = 10, img_obj.height - text_height - 10
        elif position == "bottom_right": x, y = img_obj.width - text_width - 10, img_obj.height - text_height - 10
        elif position == "center": x, y = (img_obj.width - text_width) // 2, (img_obj.height - text_height) // 2

        draw.text((x, y), text_content, font=font, fill=text_color)
        print(f"   - 添加文字水印: '{text_content}'")
        return img_obj # 返回处理后的图片对象

    elif w_type == "image":
        watermark_img_path = watermark_config.get("watermark_image_path")
        position = watermark_config.get("position", "bottom_right")
        opacity = watermark_config.get("opacity", 0.5)
        size_ratio = watermark_config.get("size_ratio", 0.15)

        if not os.path.exists(watermark_img_path):
            print(f"❌ 水印图片文件不存在:{watermark_img_path}")
            return img_obj


  return img_obj


def run_watermark_processor(config_path):
    """
    运行图片水印处理器,根据配置文件批量添加水印。
    这是你的“图片批量加水印神器”的核心。
    :param config_path: 配置文件的路径
    """
    try:
        with open(config_path, 'r', encoding='utf-8') as f:
            config = yaml.safe_load(f)
    except FileNotFoundError:
        print(f"❌ 配置文件未找到:{config_path}")
        return
    except yaml.YAMLError as e:
        print(f"❌ 配置文件解析错误:{e}")
        return

    source_dir = os.path.expanduser(config.get("source_directory"))
    output_dir = os.path.expanduser(config.get("output_directory"))

if __name__ == "__main__":
    # 确保 config_watermark.yaml 在同一目录下
    config_file_path = os.path.join(os.path.dirname(__file__), "config_watermark.yaml")
    run_watermark_processor(config_file_path)
操作步骤:
准备环境: 确保你已经安装了Pillow (pip install Pillow) 和 PyYAML (pip install pyyaml)。
创建文件: 创建一个源文件夹,放入各种你希望处理的图片文件。
准备Logo(如果使用图片水印): 准备一个Logo图片(最好是透明背景的PNG格式),命名为your_logo.png,放在与watermark_processor_main.py和config_watermark.yaml同一目录下。
保存代码: 将上面的 watermark_processor_main.py 和 config_watermark.yaml 两个文件保存到同一个目录下。

修改配置: 打开 config_watermark.yaml,根据你实际的文件夹路径修改 source_directory 和 output_directory。启用/禁用你需要的文字水印或图片水印规则,并调整其参数(文字内容、字体、颜色、位置,或Logo路径、透明度、大小)。
运行: 在终端中进入 watermark_processor_main.py 所在的目录,运行 python watermark_processor_main.py。
下面是批量加水印流程演示图:
A[开始] --> B{加载 config_watermark.yaml};
B --> C[获取源文件夹图片列表];
C -- 遍历每张图片 --> D{打开图片,转为RGBA模式};
D -- 检查 watermark_rules --> E{对每条启用规则};
E -- text --> F[添加文字水印];
E -- image --> G[添加图片水印];
F --> H[将处理后的图片保存到输出目录];
G --> H;
H --> I[处理下一个图片];
I -- 所有图片处理完毕 --> J[结束];
告别手动P图,你的视觉内容从此自带“版权”!
恭喜你!通过本篇文章,你已经掌握了Python图片处理的又一项强大魔法——图片批量加水印!我们从图片版权保护和品牌宣传的痛点出发,学会了如何:
Pillow库与ImageDraw: 掌握Python绘制文字和图形的核心工具。
Python批量添加文字水印: 自定义水印文字、字体、颜色、透明度和位置,为你的图片打上专属标签。
Python批量添加图片水印: 轻松叠加Logo、二维码等图片水印,提升品牌辨识度。
构建可配置工具: 通过简单的配置文件,一键管理你的所有图片加水印需求。

现在,你不再需要手动打开PS,一张张为图片加水印。你只需准备好图片和水印素材,修改一下配置文件,运行脚本,你的海量作品就能一键拥有版权信息或品牌Logo,实现高效的图片自动化!让你的视觉内容更专业、更安全!
除了水印,你还希望Python能帮你实现哪些图片处理的自动化功能?比如批量裁剪、智能调色,或者图片风格转换?你会在哪些场景下使用这个批量加水印神器?
以上就是基于Python实现图片批量加水印的方法的详细内容,更多关于Python图片批量加水印的资料请关注风君子博客其它相关文章!
您可能感兴趣的文章:
- 基于Python实现一个图片水印批量添加工具
- Python实现为图片批量添加随机水印
- Python操作word实现添加文字或图片水印
- Python实现给图片添加文字或图片水印
- Python实现为图片添加水印的示例详解